Neural Collapse
“I thought this was supposed to be a world without pain and without uncertainty”
Ikari Shinji
Concept
After Takashi’s death, I took some time exploring various ideas I had, and thinking about what kind of project I could for next. I wanted to do a fun one, with colors, and maybe a bit more abstract than my previous efforts. Here’s some prototype of early june, that I may or may not revisit someday.
Even why I tell myself I want to work on something more abstract, it seems my inspiration keeps coming from images of pop-culture that get stuck in the folds of my brain.
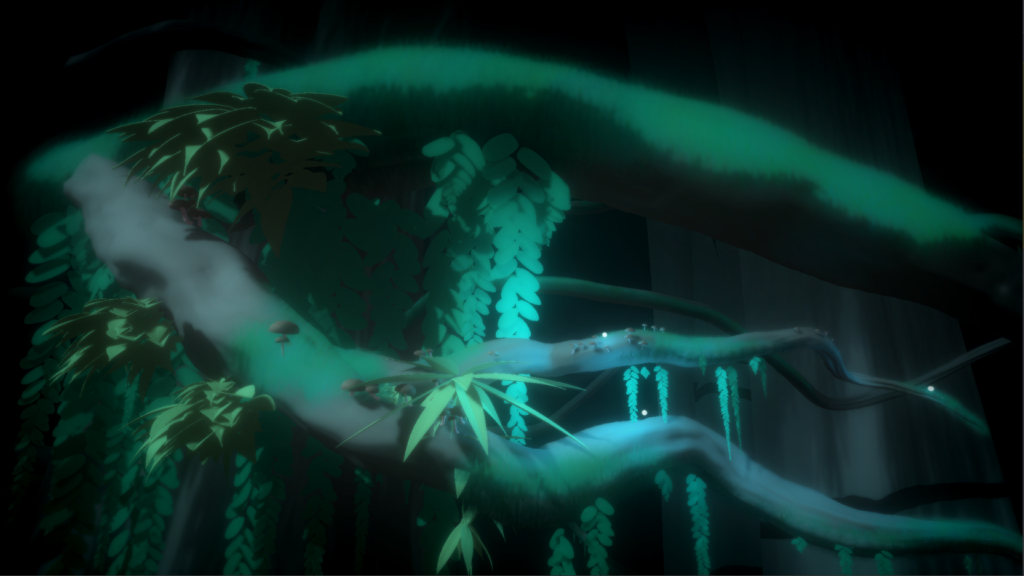
This time, the basic idea for the concept comes from a short sequence of animation that appear at regular interval in Neon Genesis Evangelion : Sequence near the beginning of episode 2
The people in charge are losing control of their giant robot and of the kid inside because it’s being brutally beaten by an alien. Things are about to get real.
The artists made some fancy future computer UI, representing the link between pilot and robot being severed.
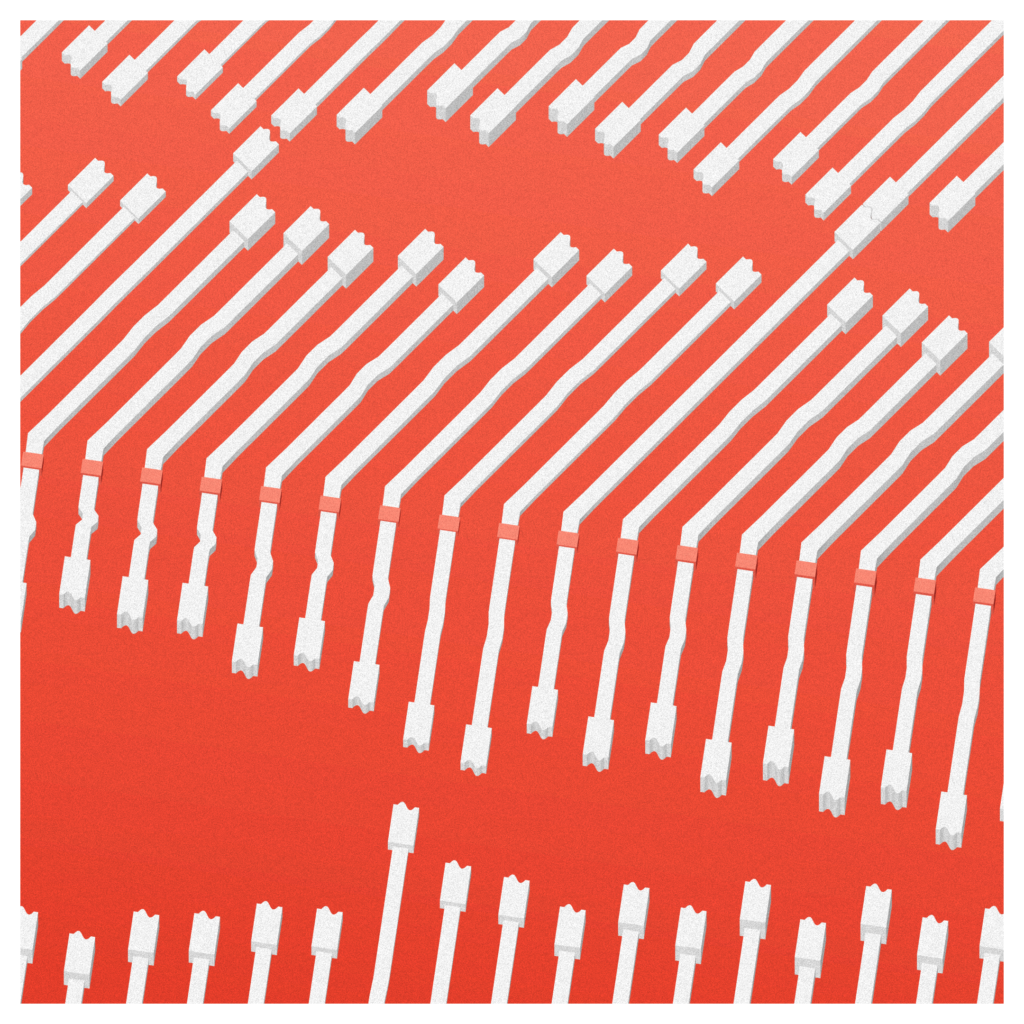
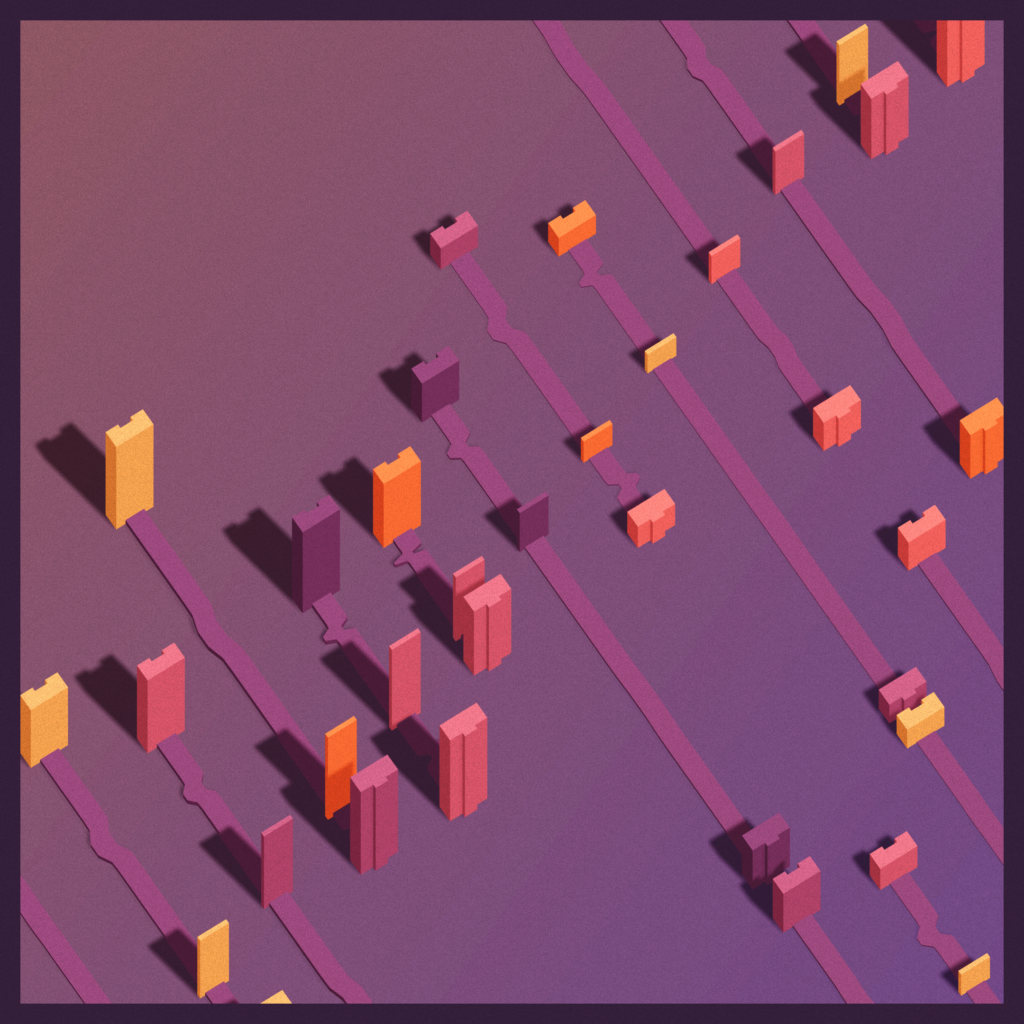
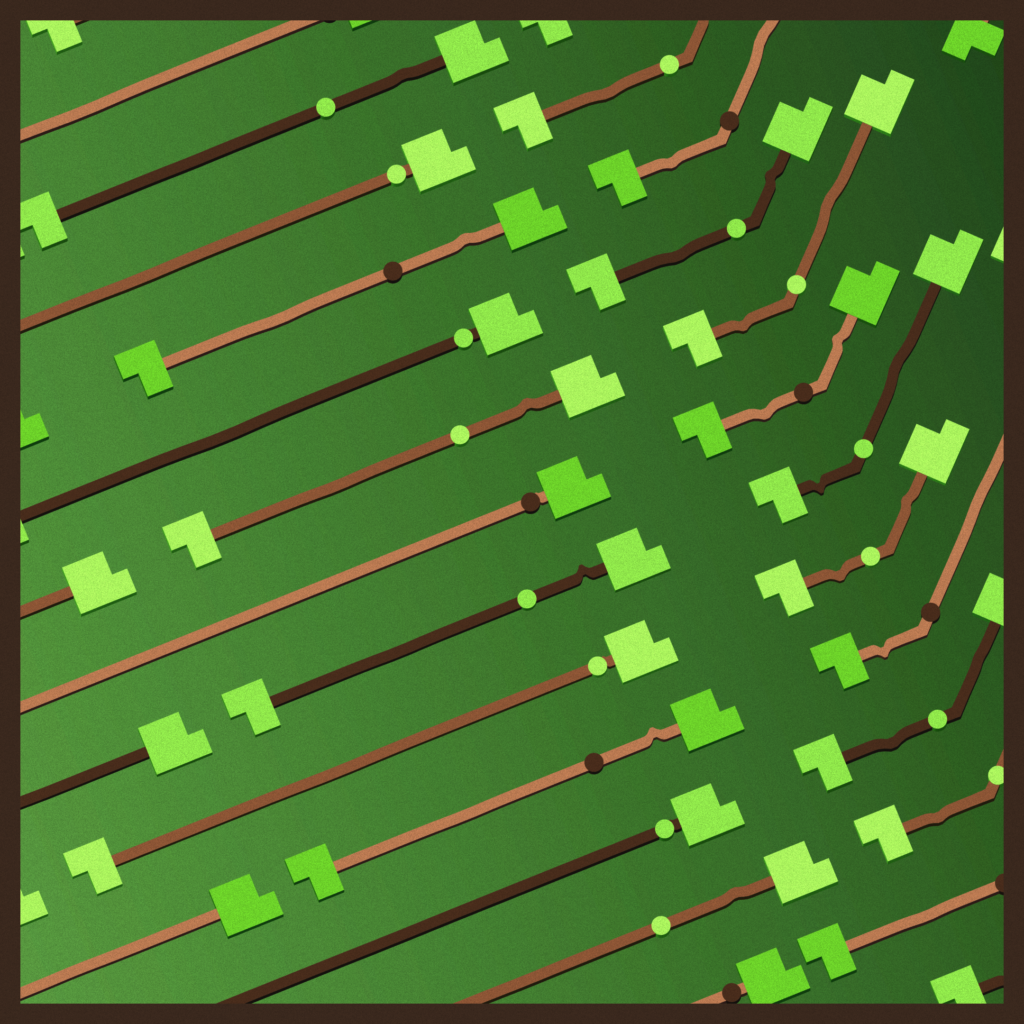
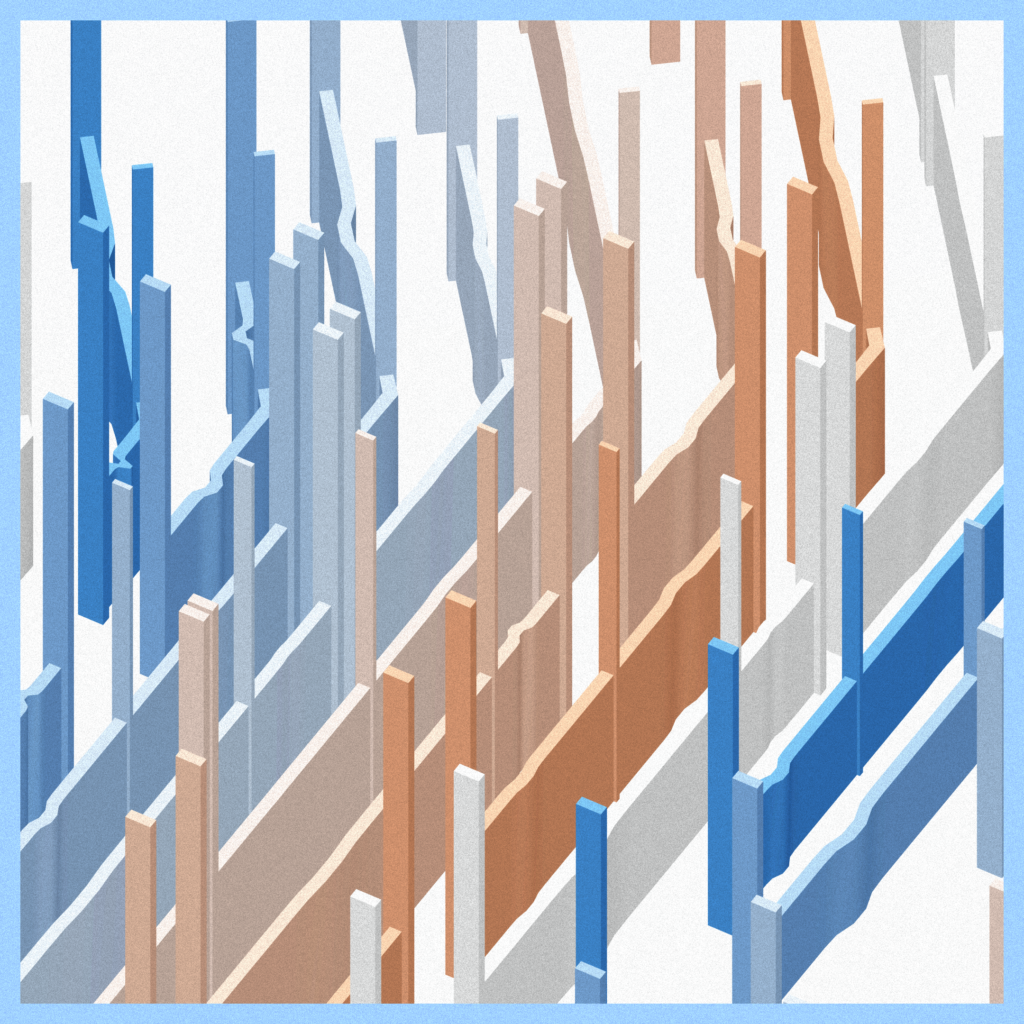
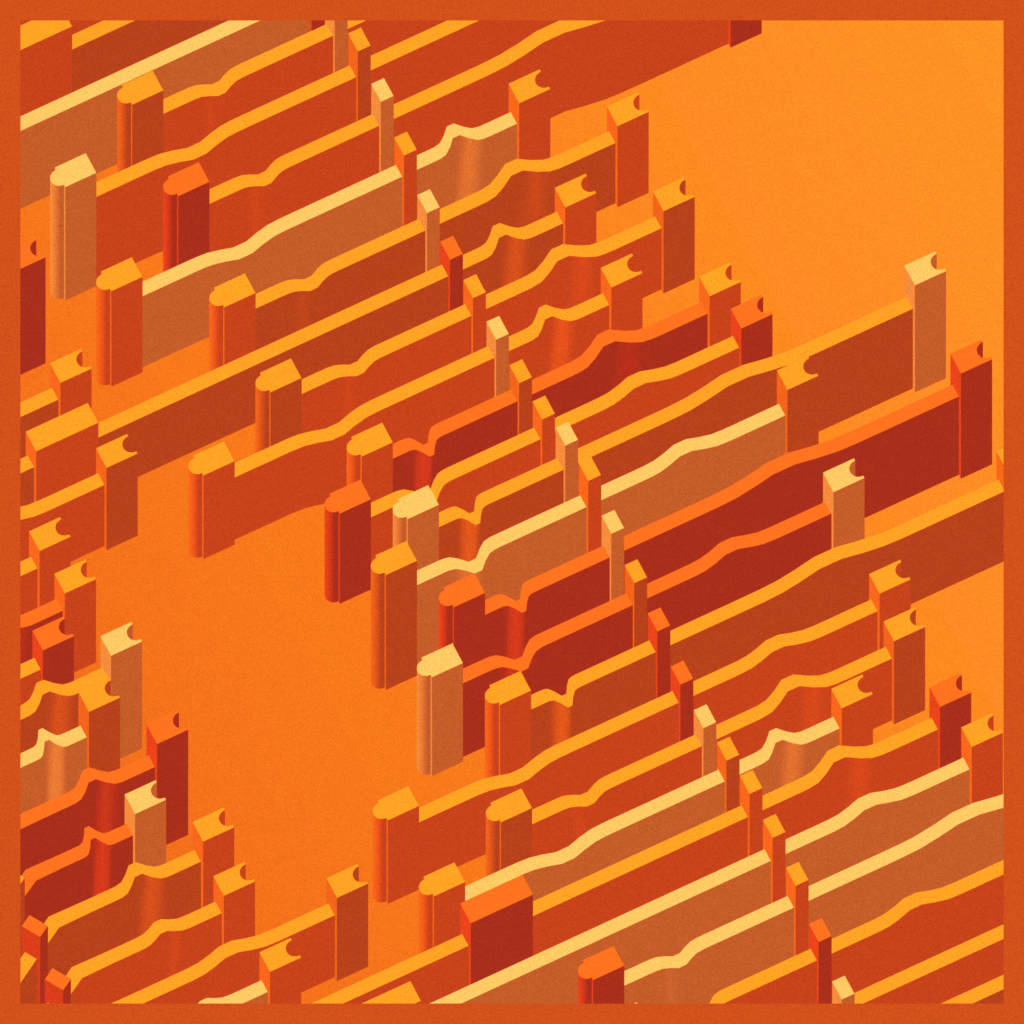
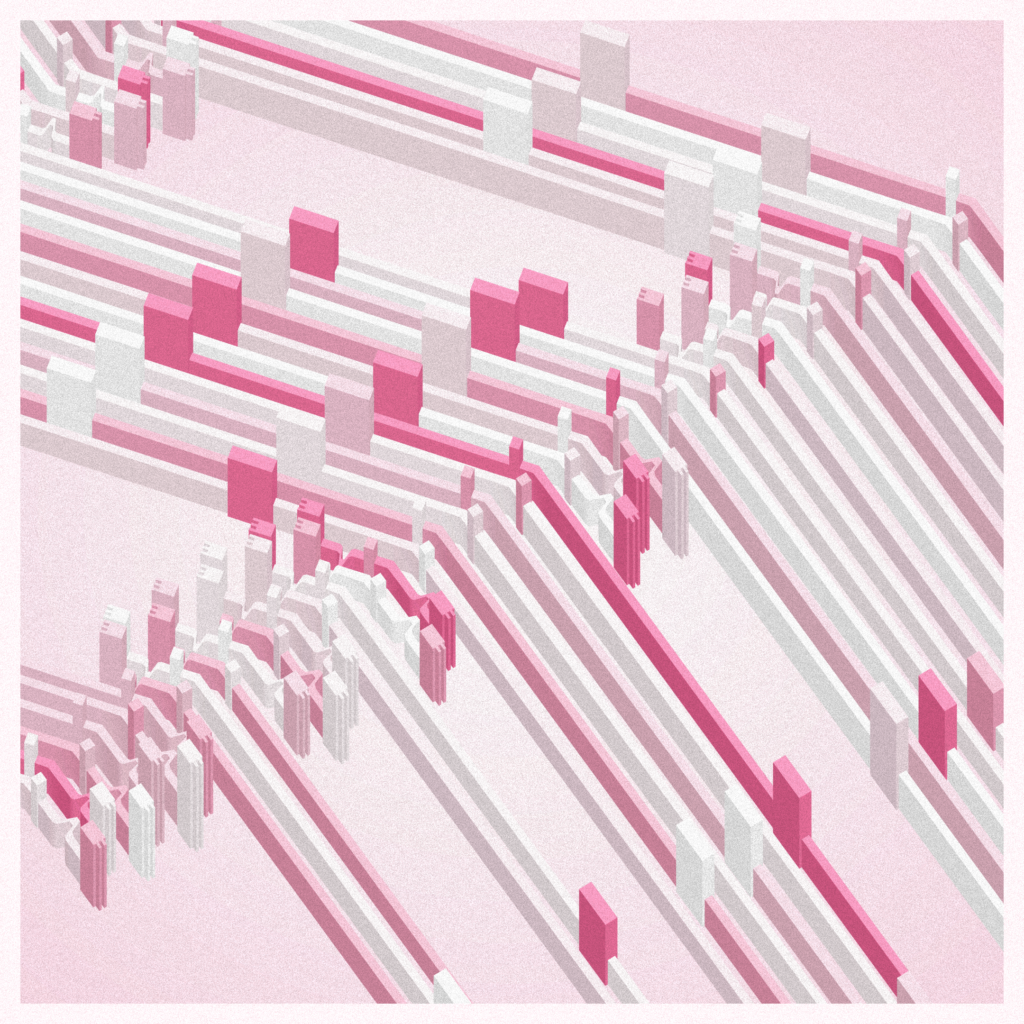
So the inspiration is very similar to that of Takashi’s Death (a detail from a pop icon I saw a long time ago), except this time, it only serves as the base upon which I built the concept. What stays is the notion of links severing, the structure, 5 palettes and a title.
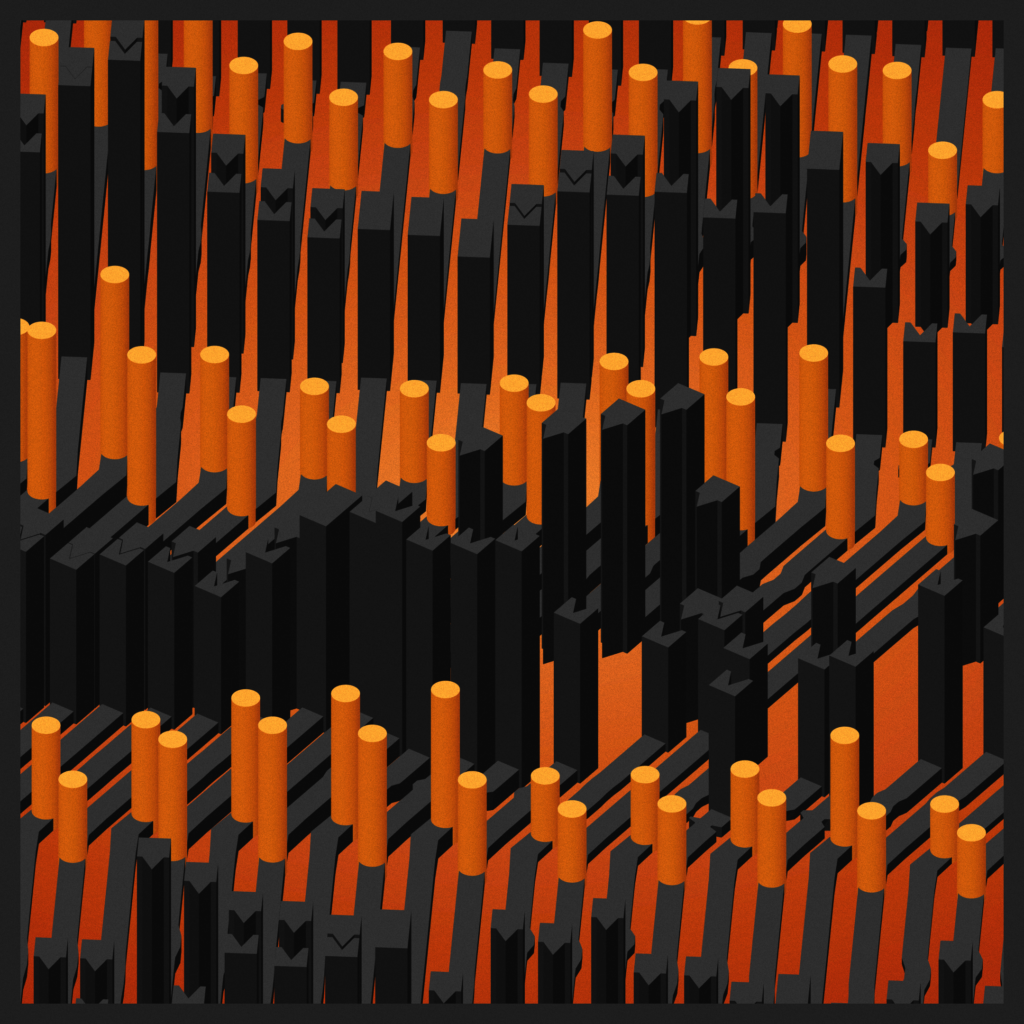
Another inspiration is obviously Cuts by todemashi. I’ve written previously that it was my favorite project on fxhash, and it still is. I like a simple concept, nice colors, orange. Here I accidentally ended up quite close conceptually (cuts vs disconnect) and decided to embrace it : A few palettes of the project are direct homages.
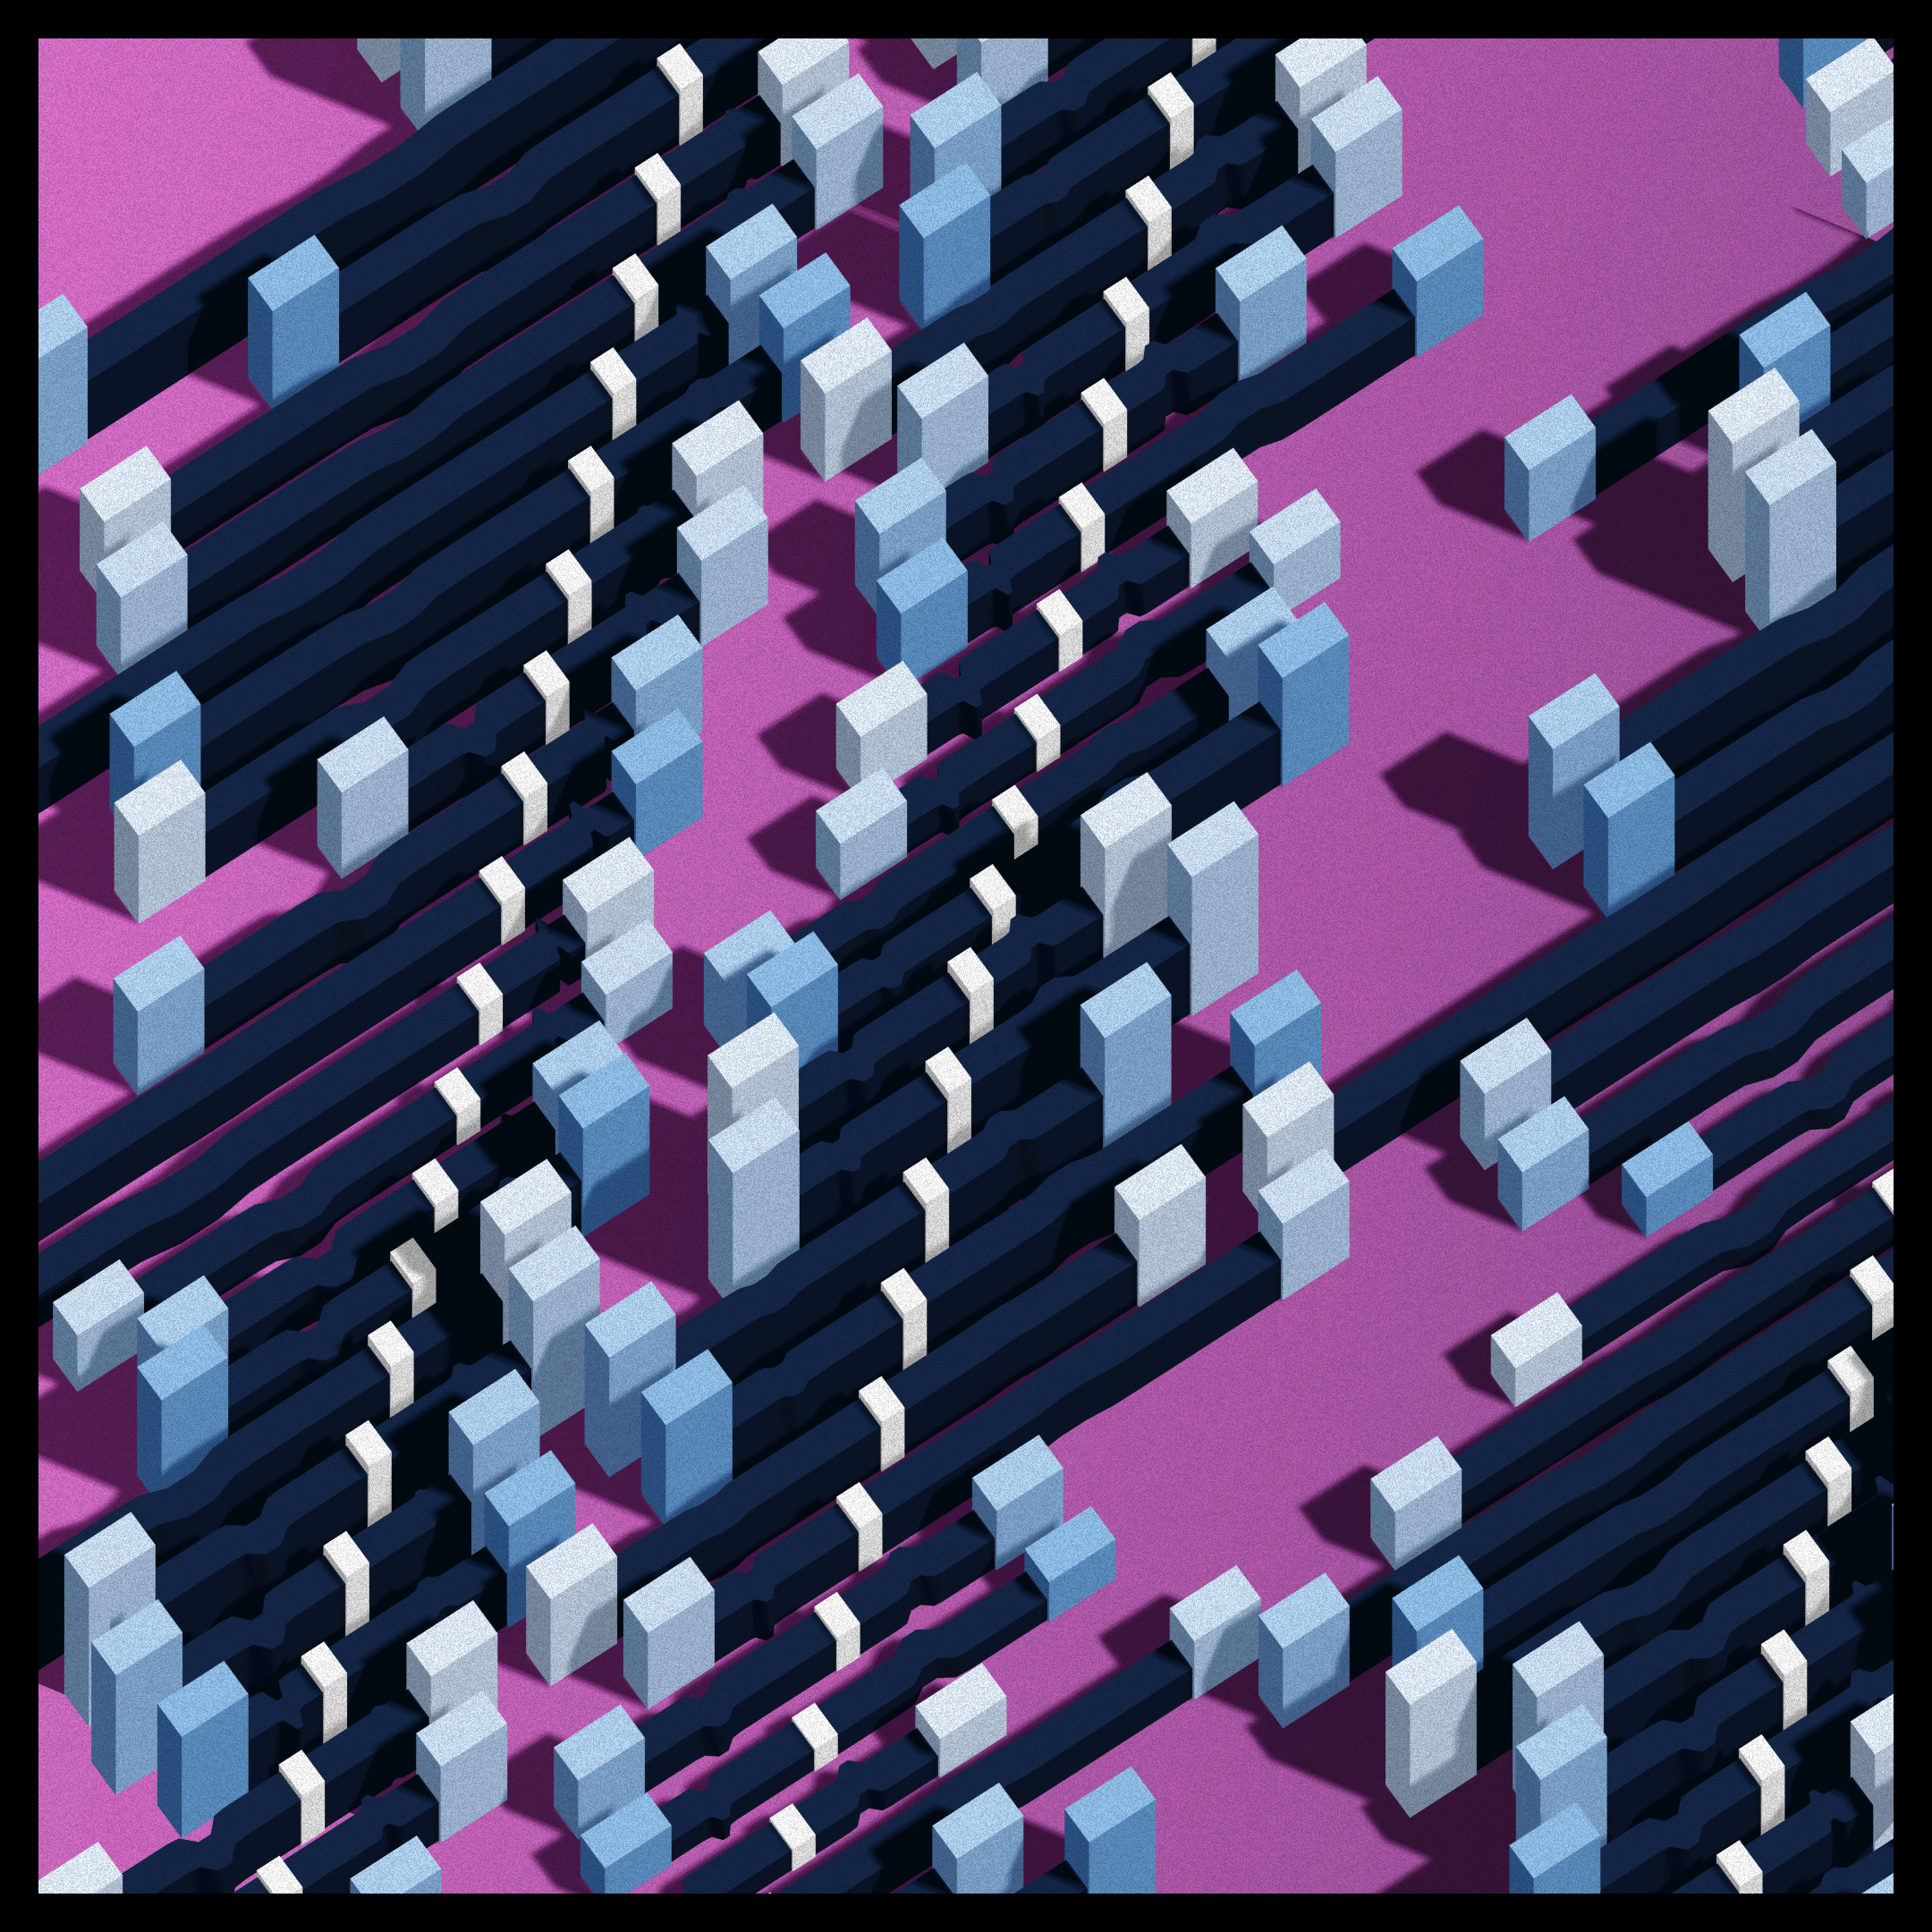
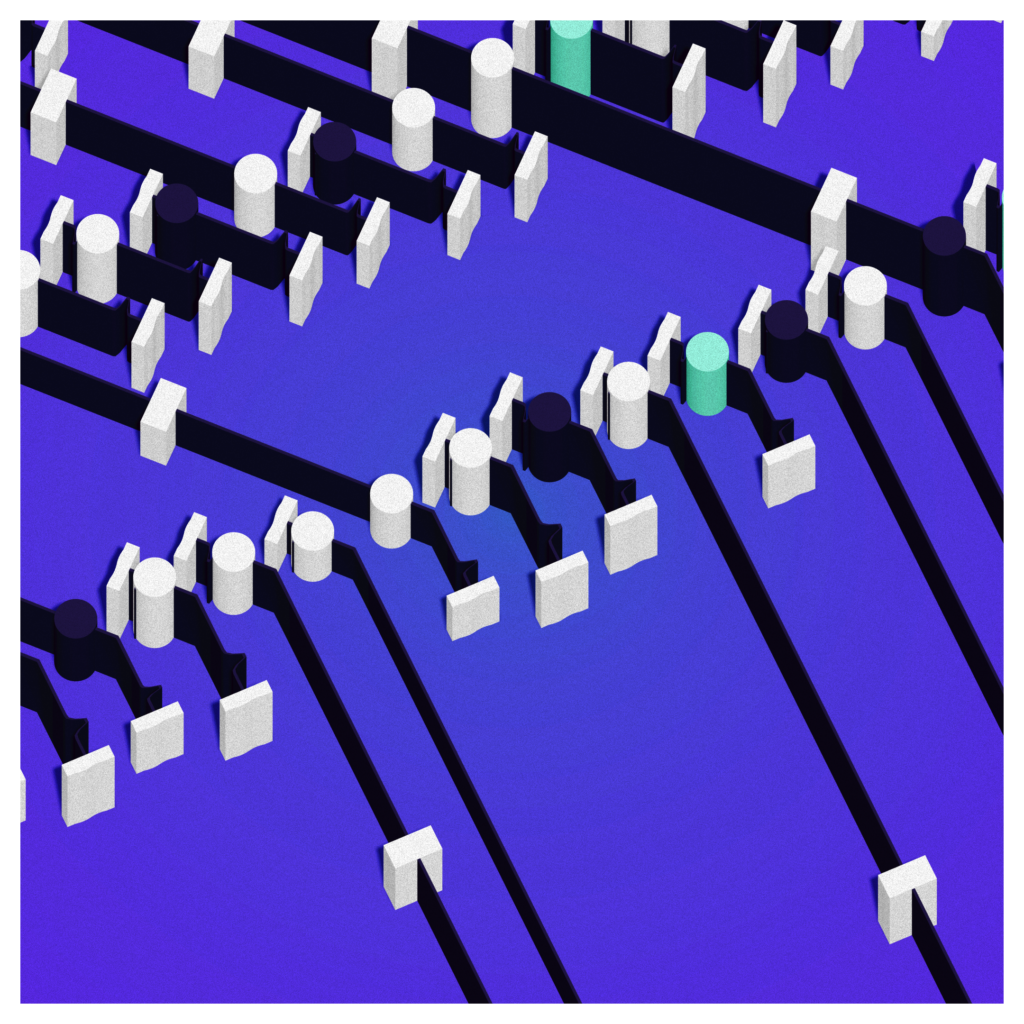
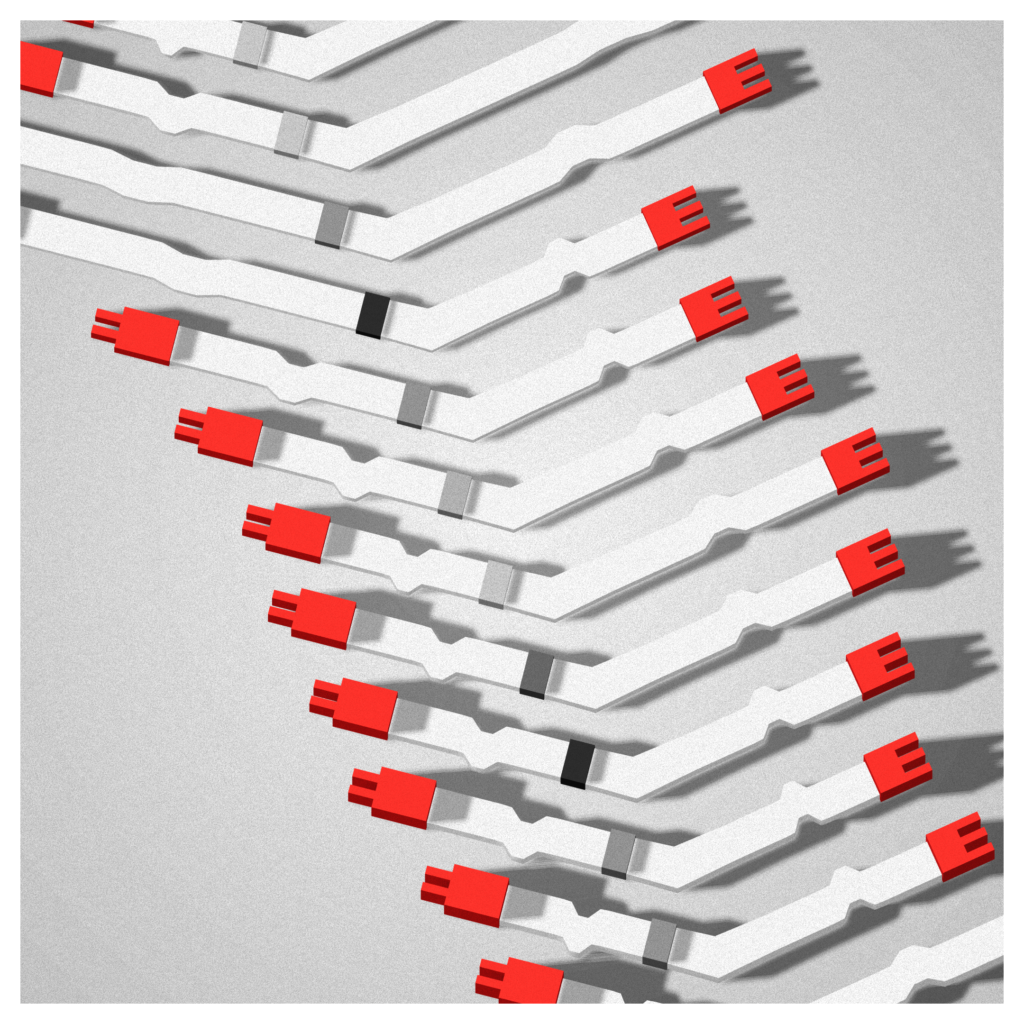
I started by prototyping close to the animation, but with an added dimension and already a bit of fancier animation :
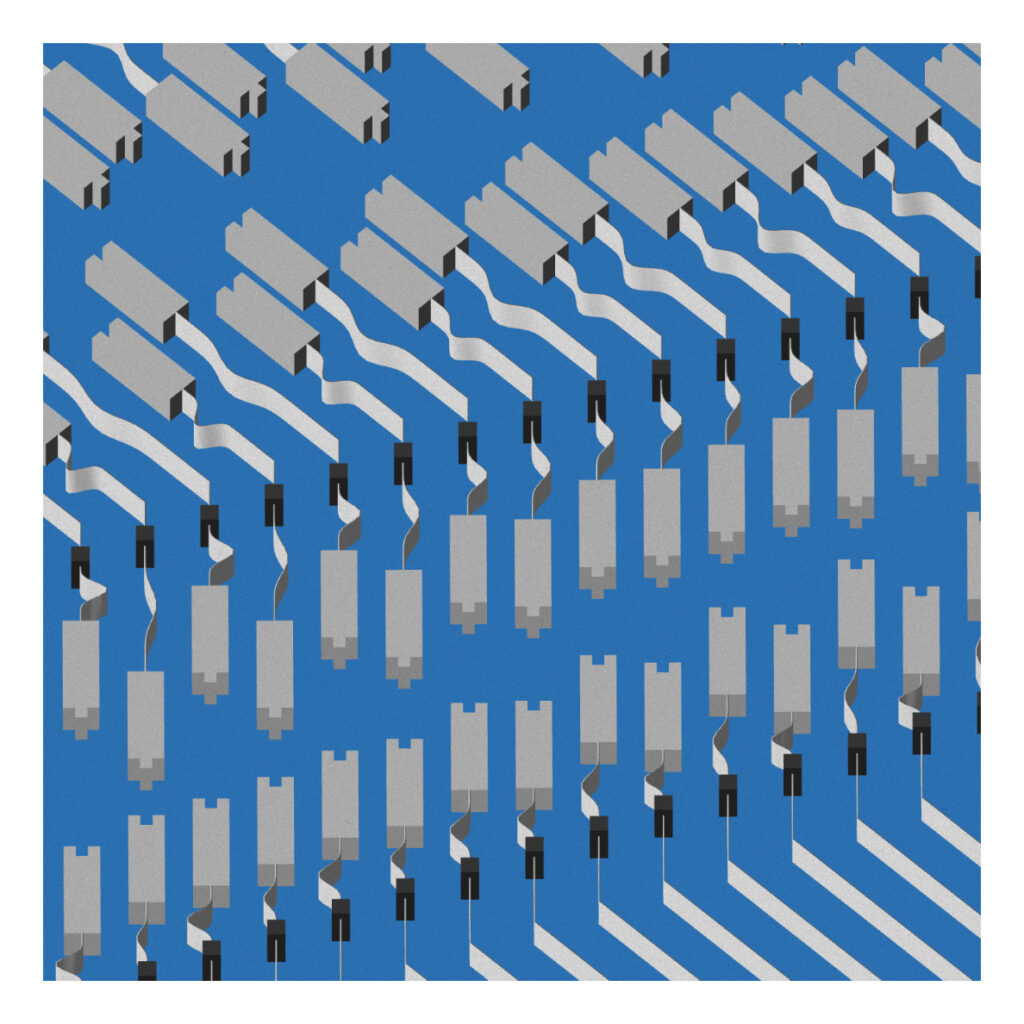
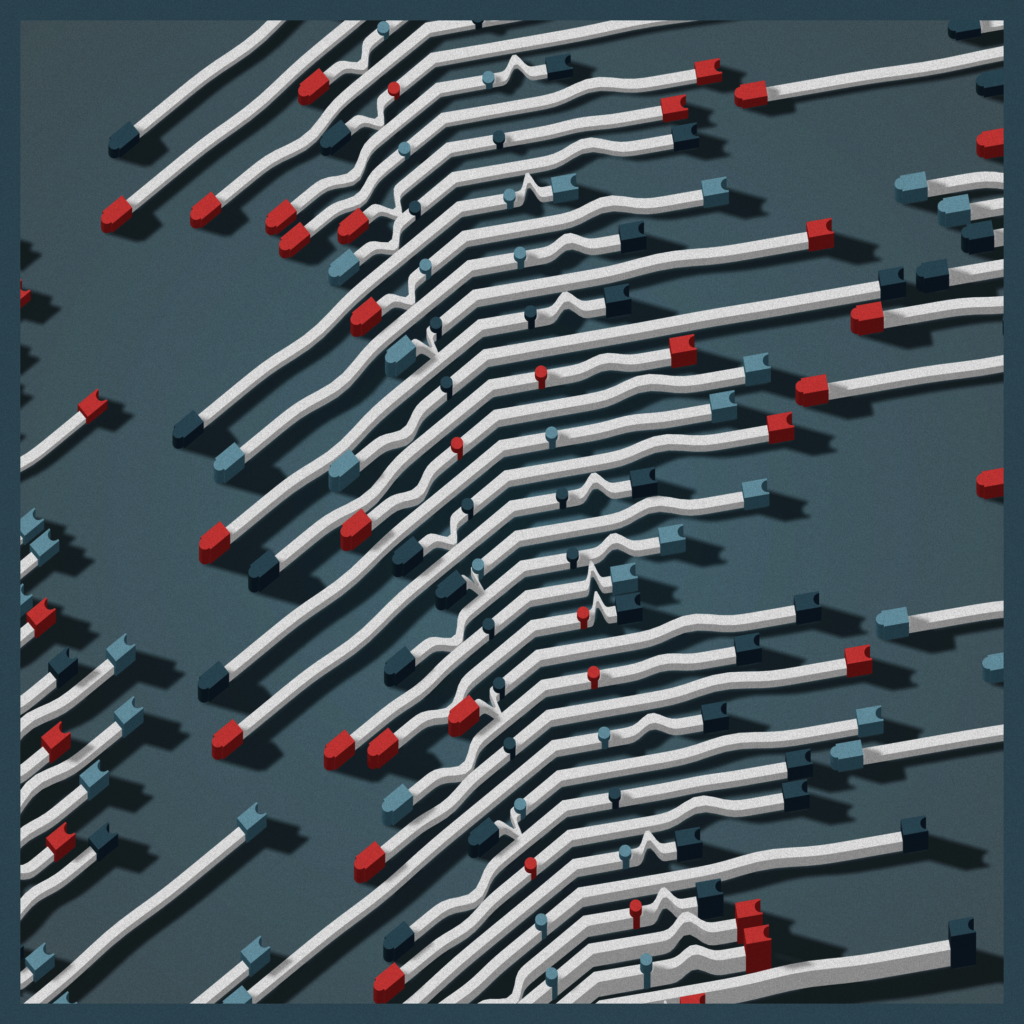
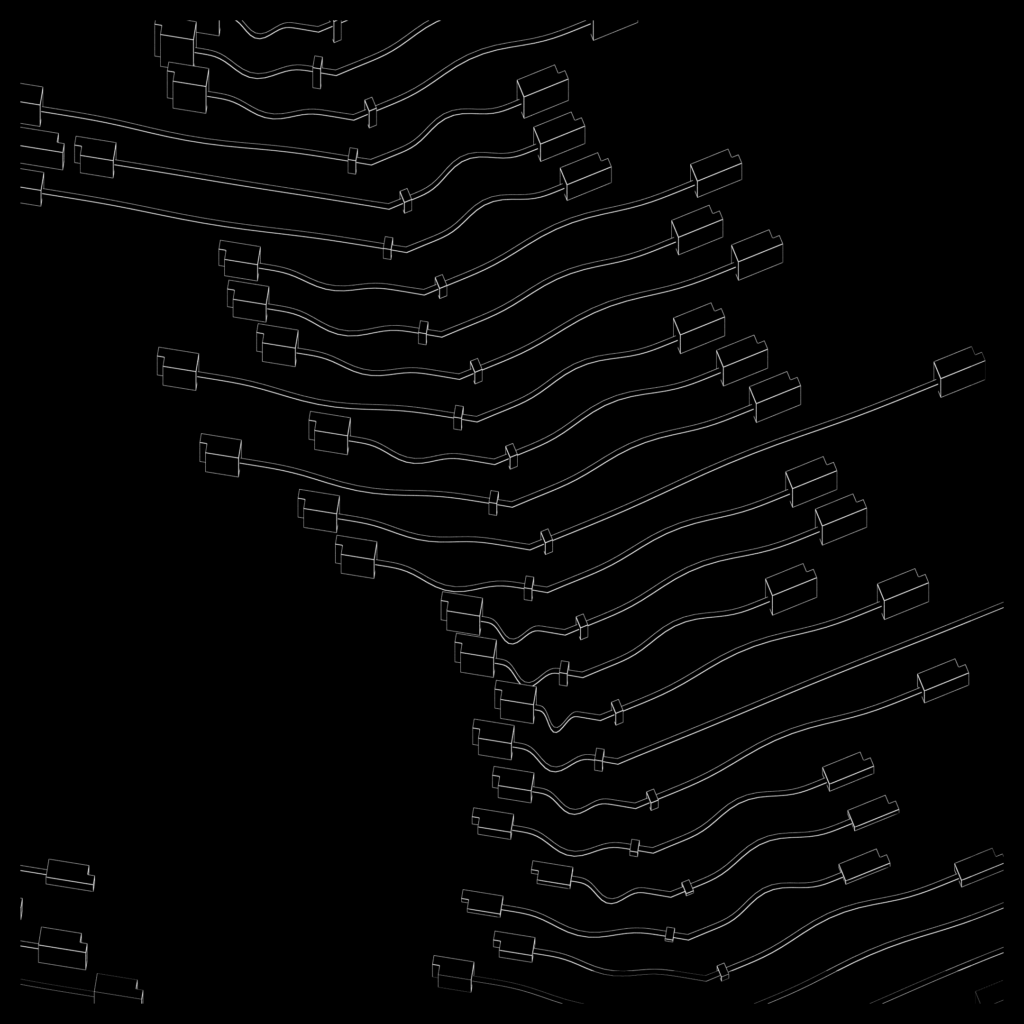
I had bit of fun with the 7-segment display, but otherwise the structure is there : connectors on lines that curve at certain angles, with little separators peppered along the way. Then the lines are stacked at an angle. Except already, there’s more than that : there’s two types of lines alternating, with the connectors alignments and the behavior when opening changing, and some occasional overlap.
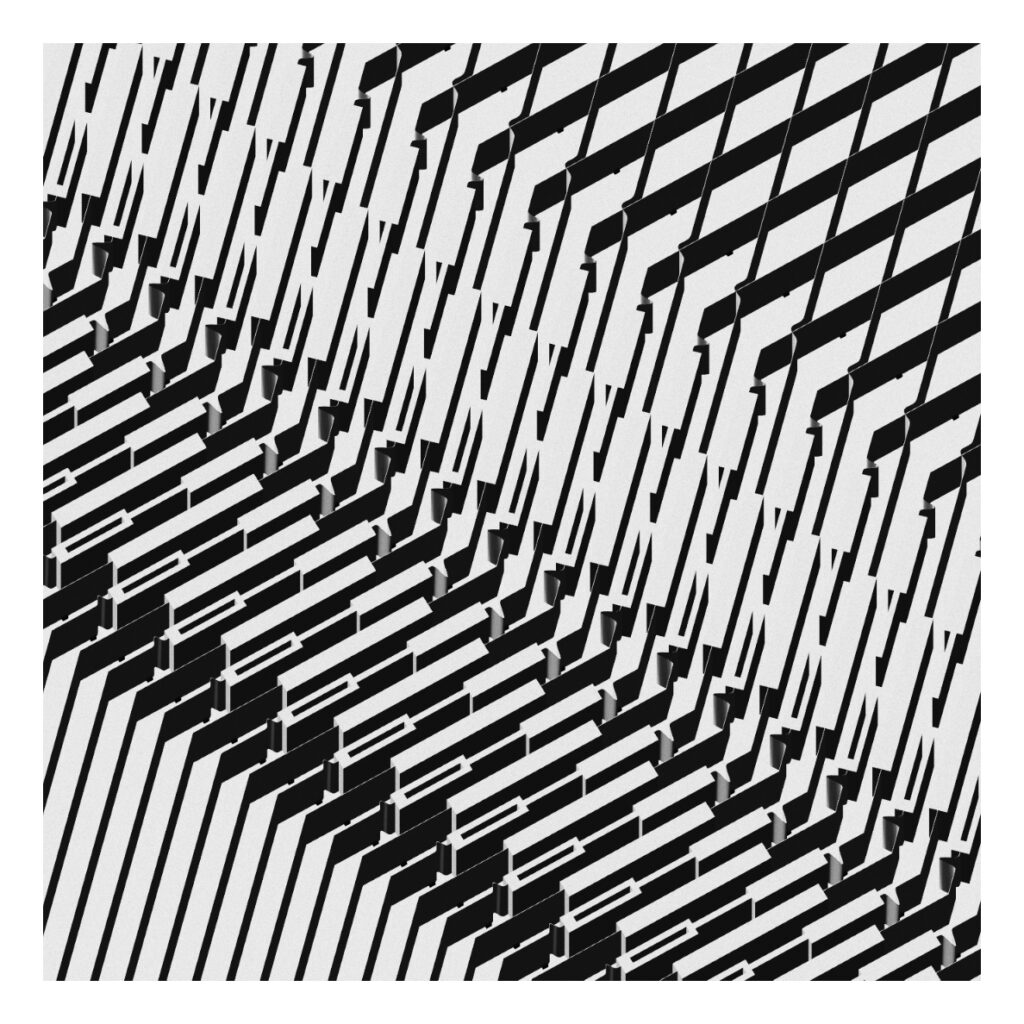
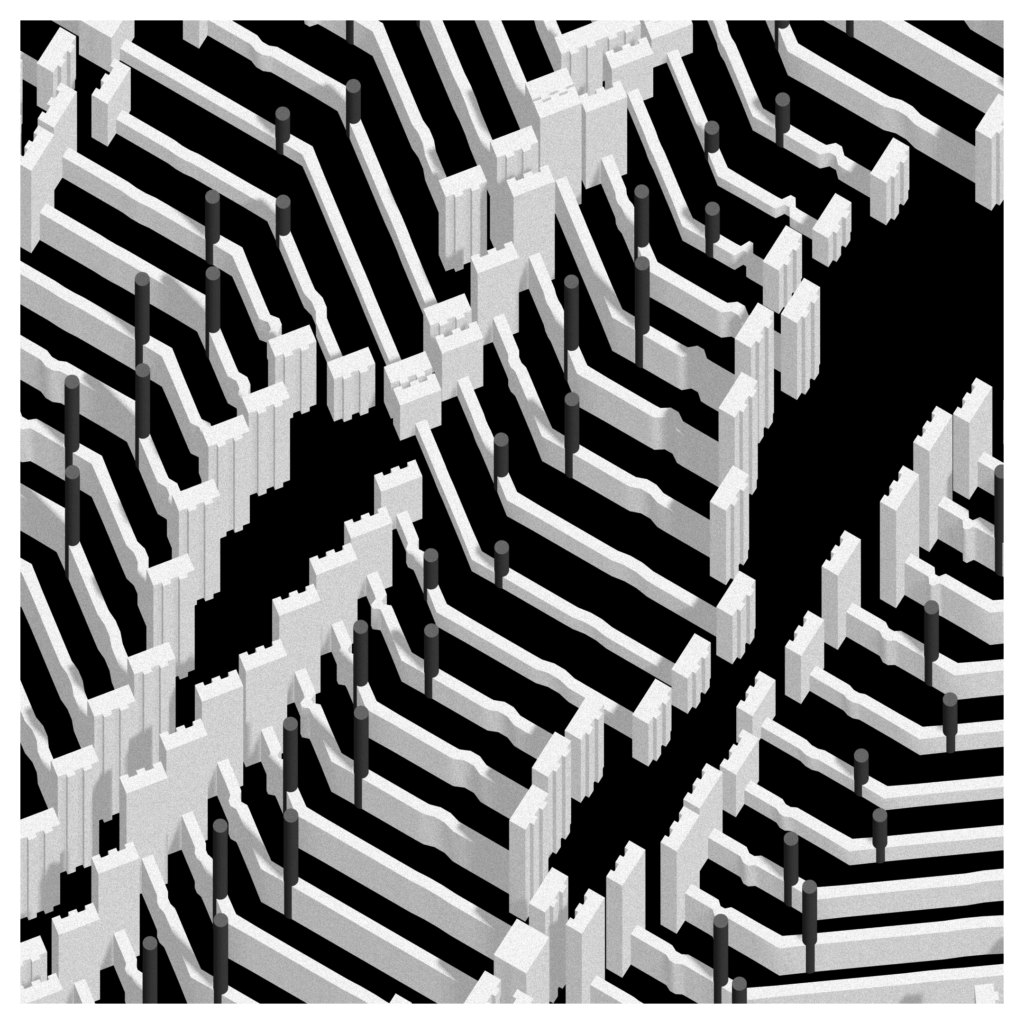
I started playing with the dimensions, the opened/closed state of the connectors and started seeing some generative stuff happening. I switched to an orthographic camera to focus on the parallel aspect of the lines, played with shadows and camera angles, saw interesting stuff and decided this would be my next project.

So the first task was to standardize a structure to handle as much dynamic values as possible. I ended with this :
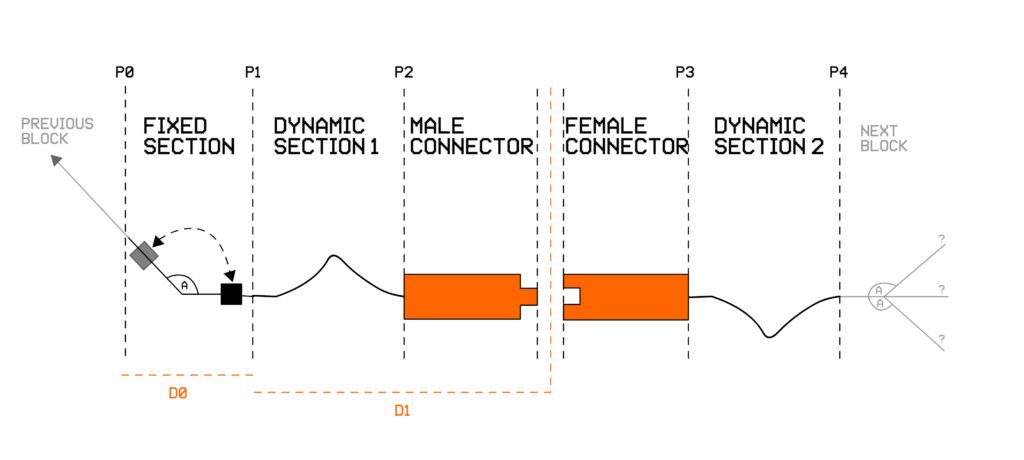
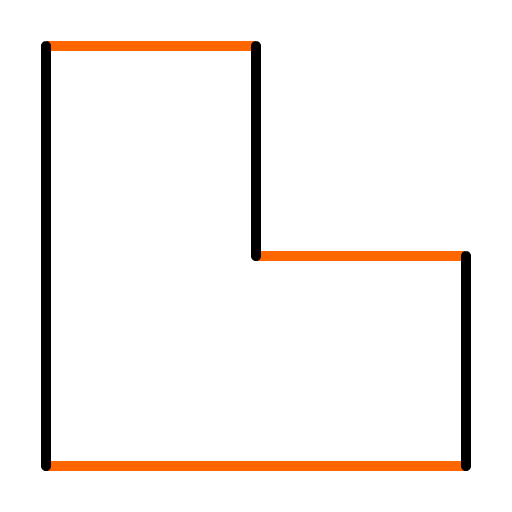
This is the basic unit (but really in 3D), every dimension being dynamic and mainly defined as ratio over the length of the block. For instance, the position of the “opening” is defined as a ratio between P1 and P4, the size of the dynamic sections adjusting accordingly.
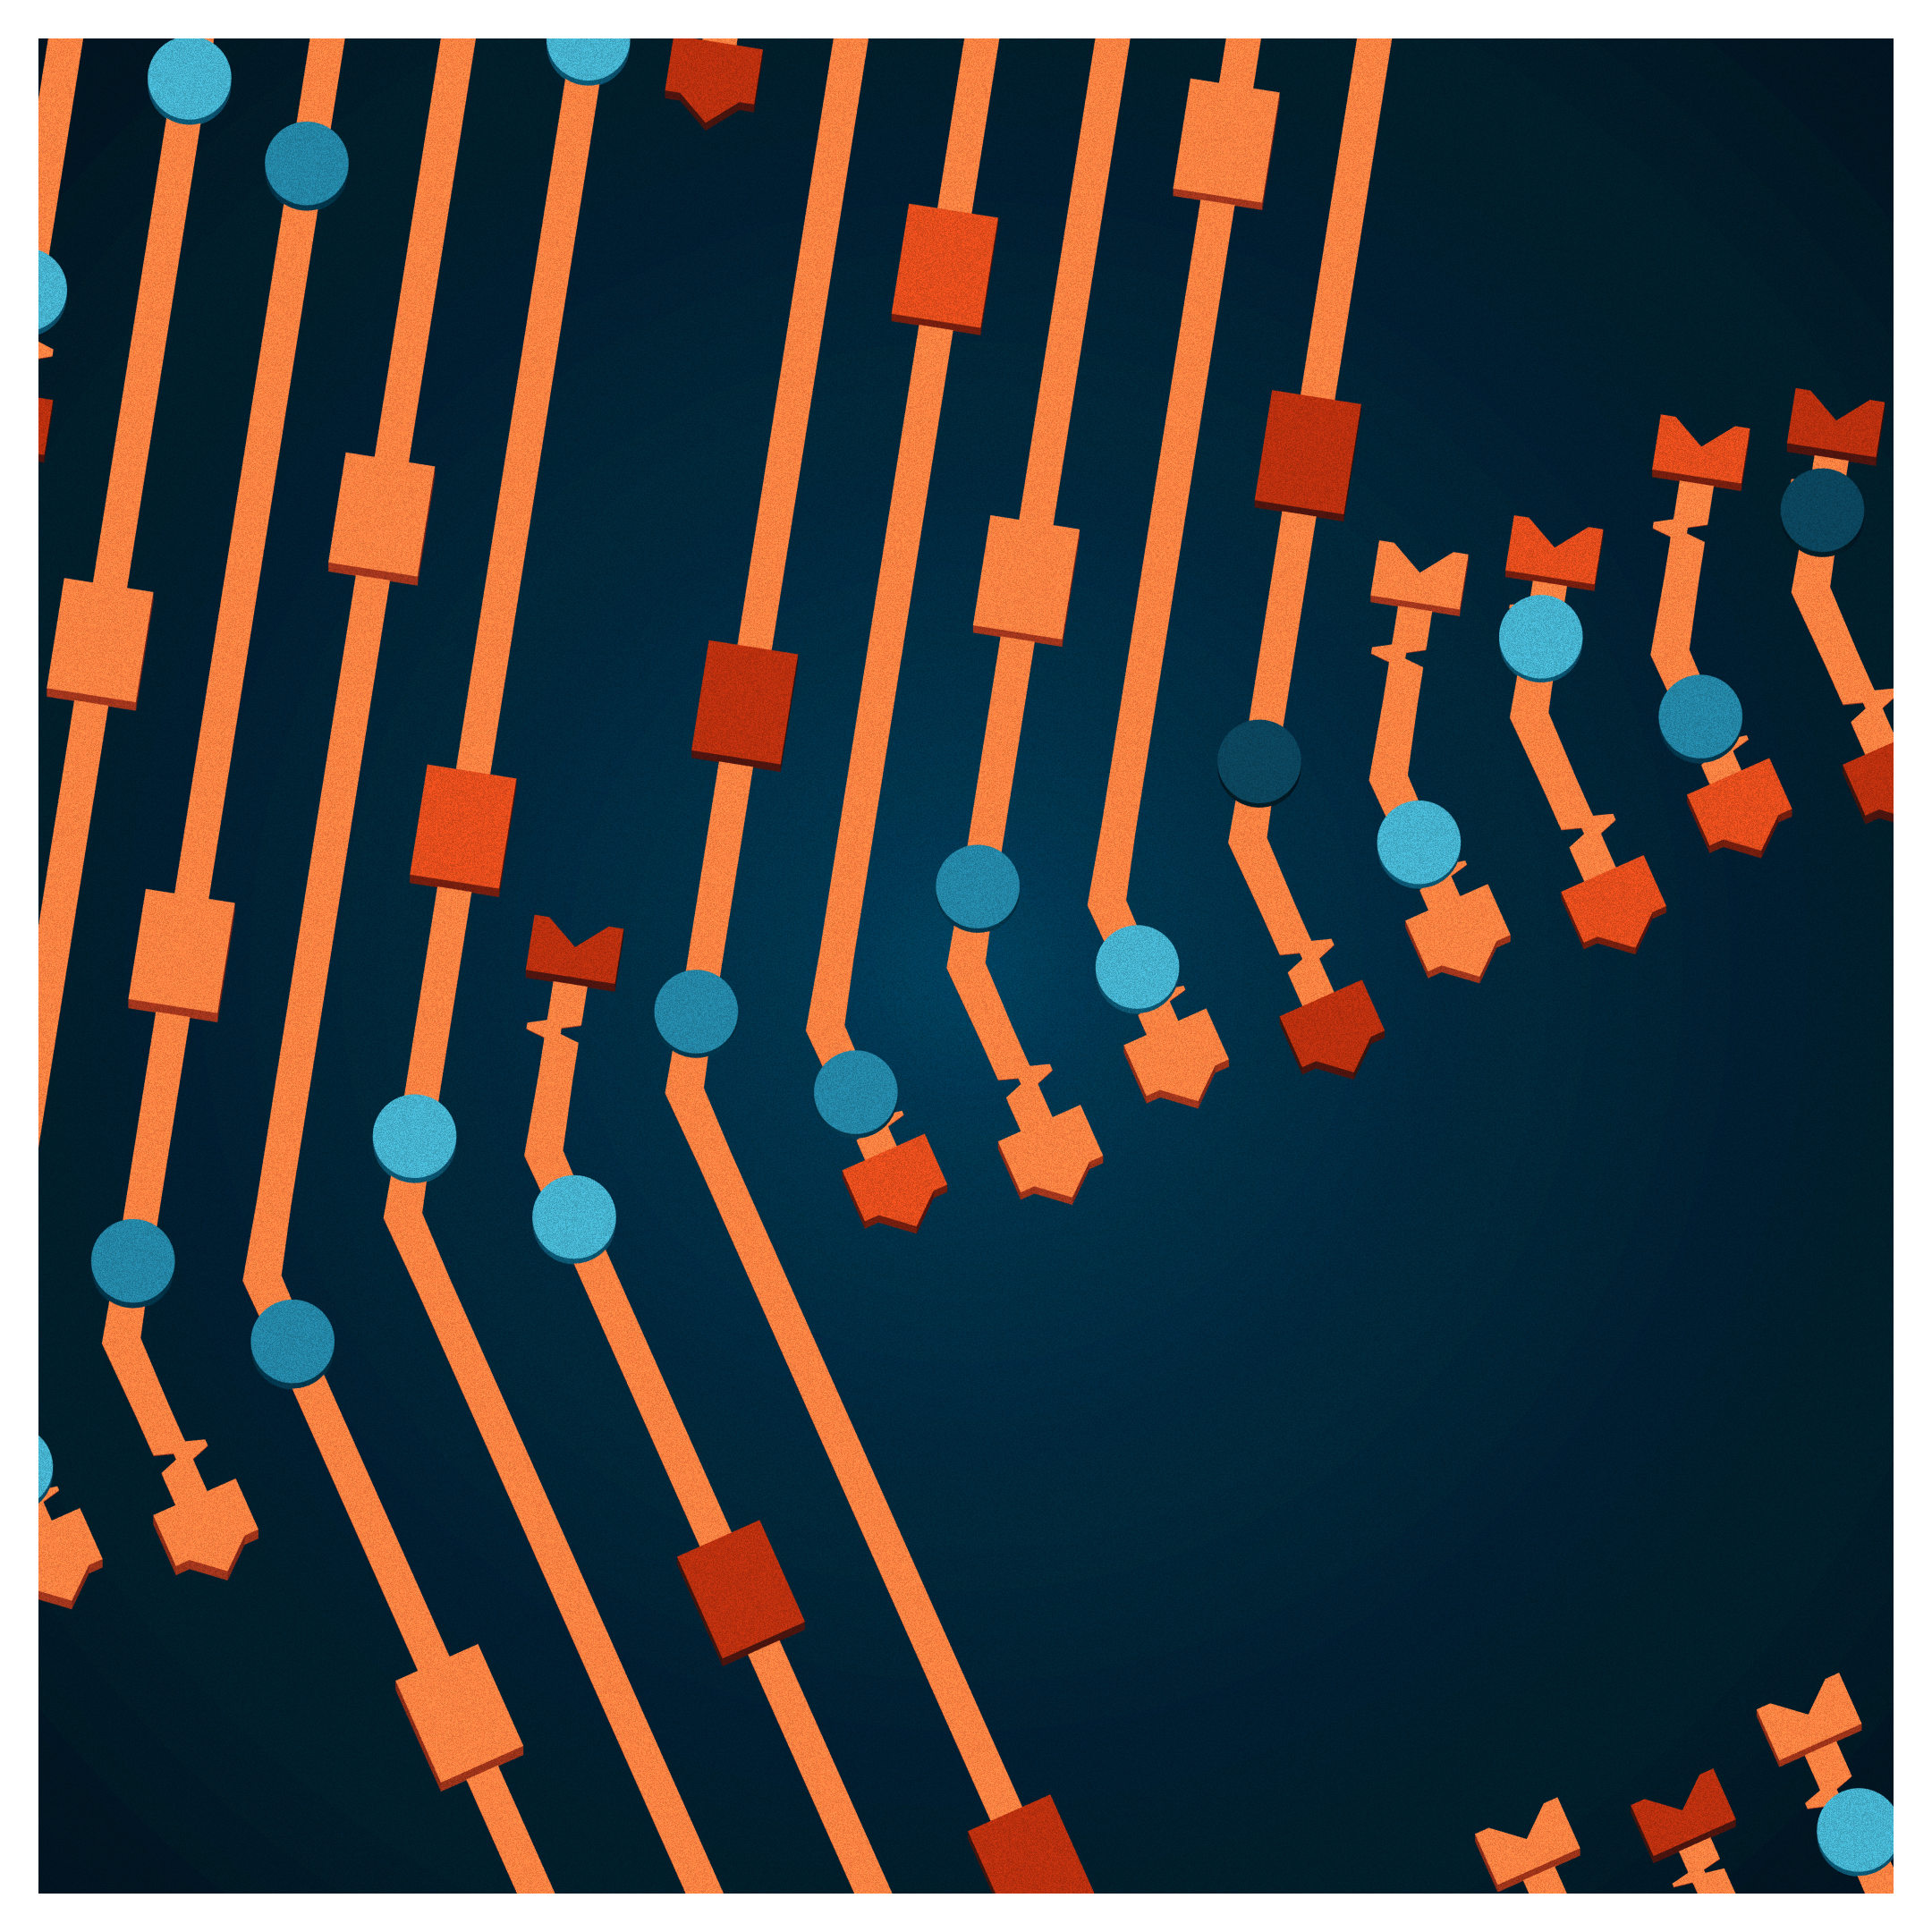
- Fixed section : a line with an angle, and a peg, that can be before or after the angle
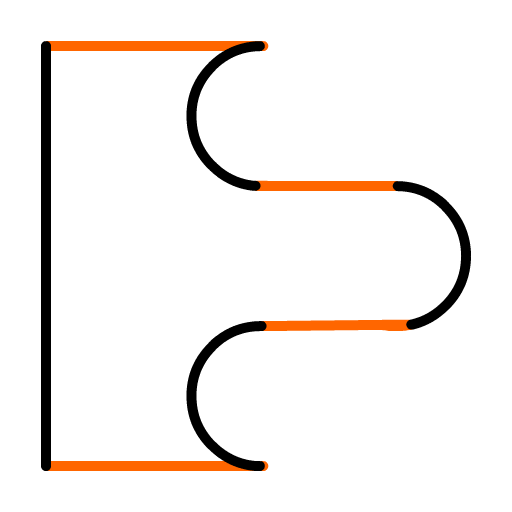
- Dynamic sections : parametric curves that respond to the opening value. One pointing up and the other down.
- The connector itself, with male and female parts. Simple extruded 2D shapes.
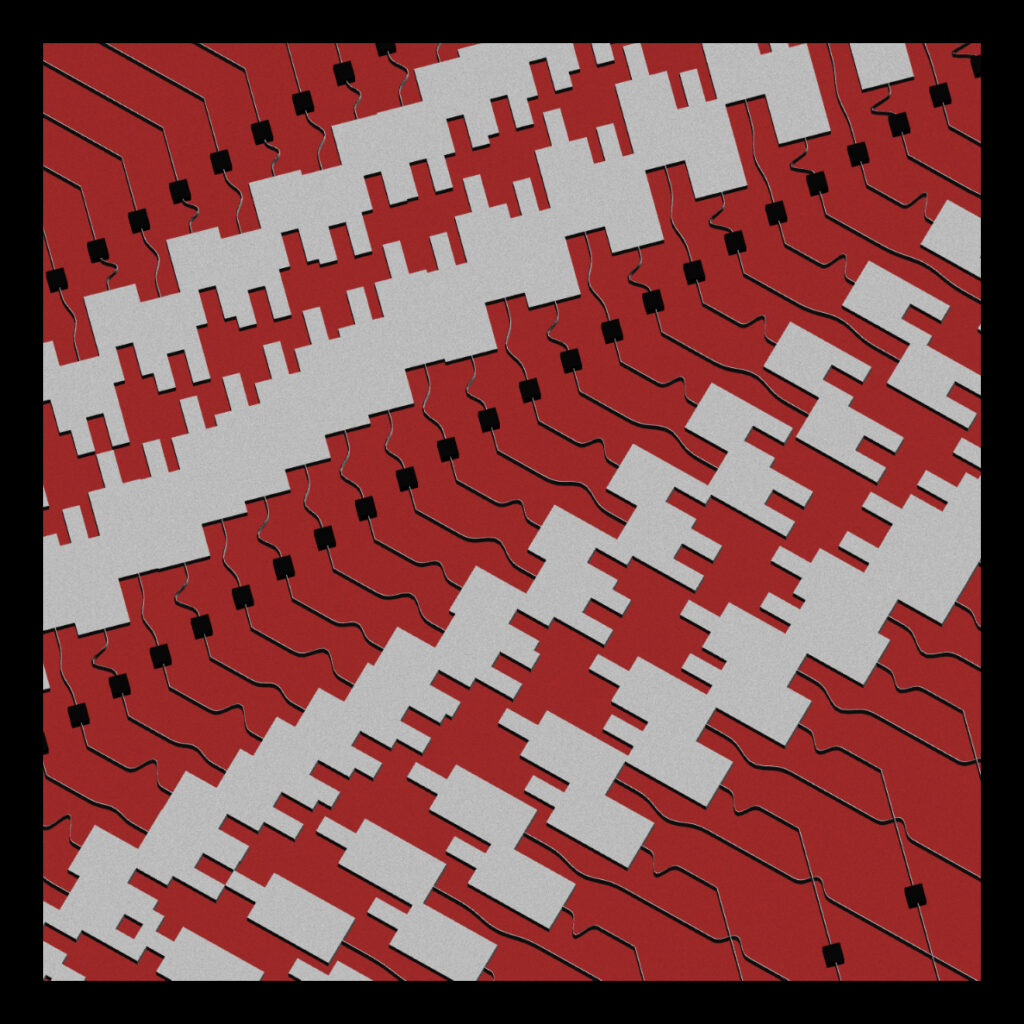
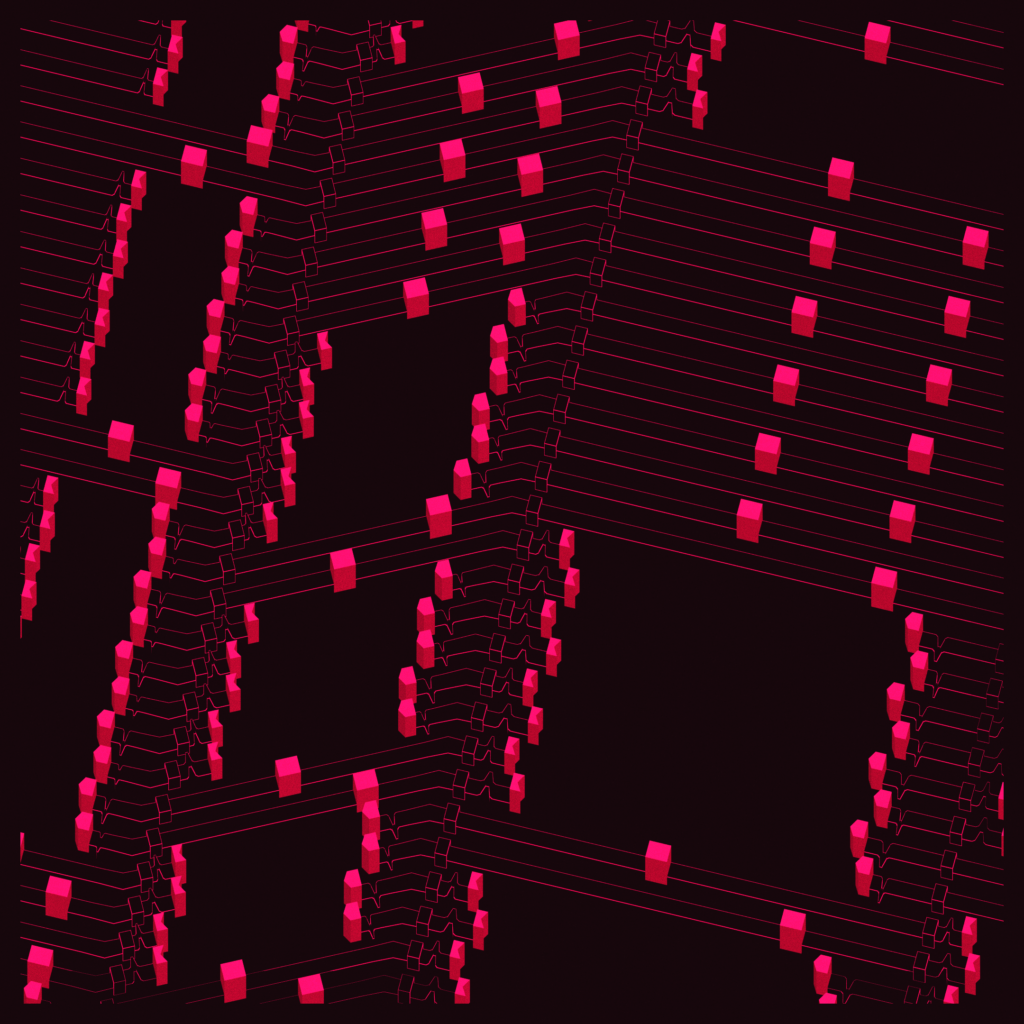
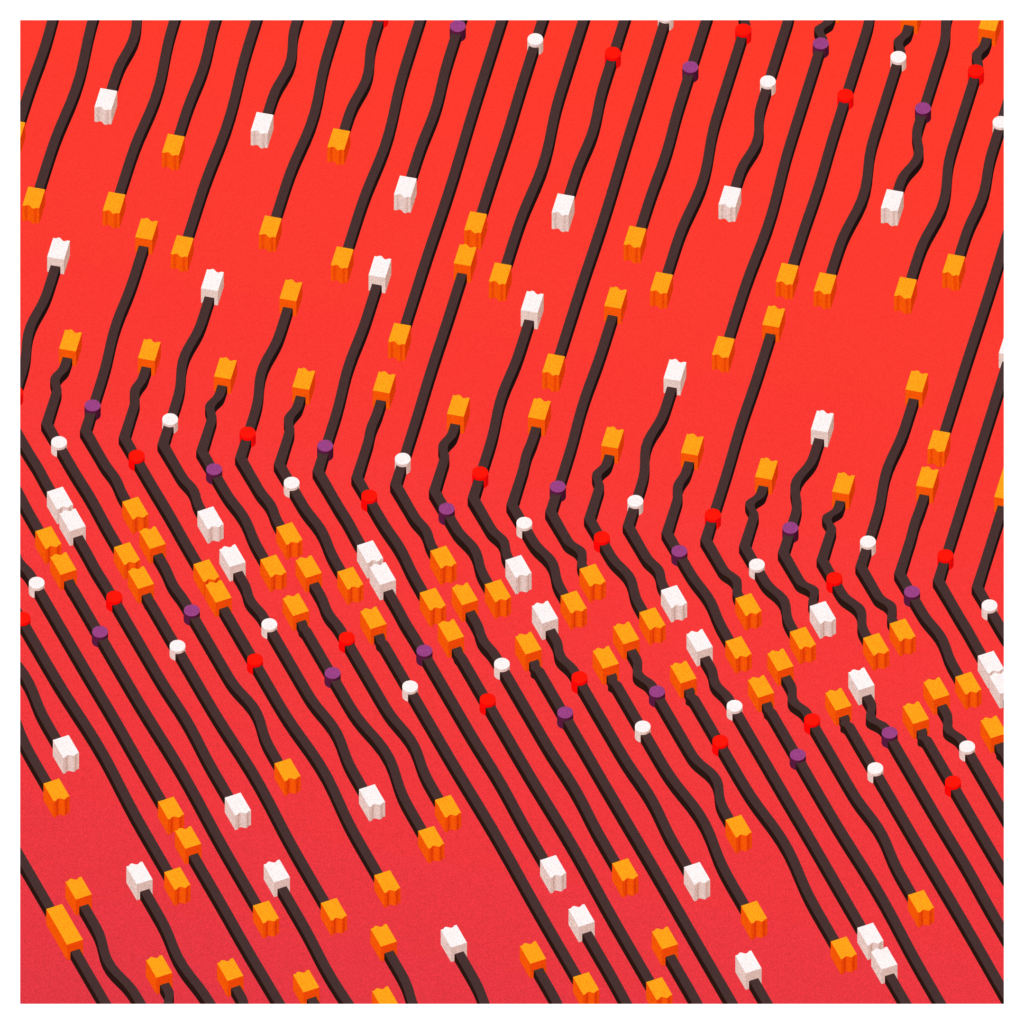
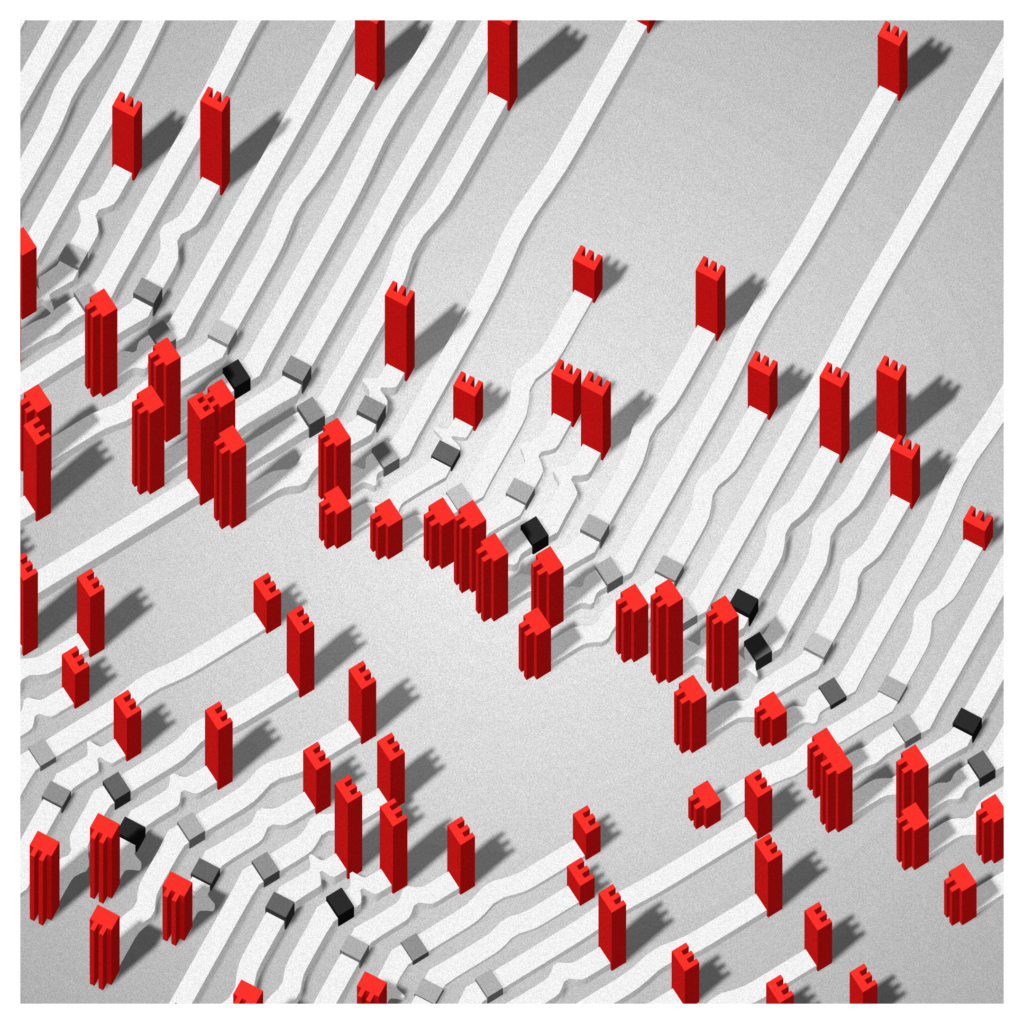
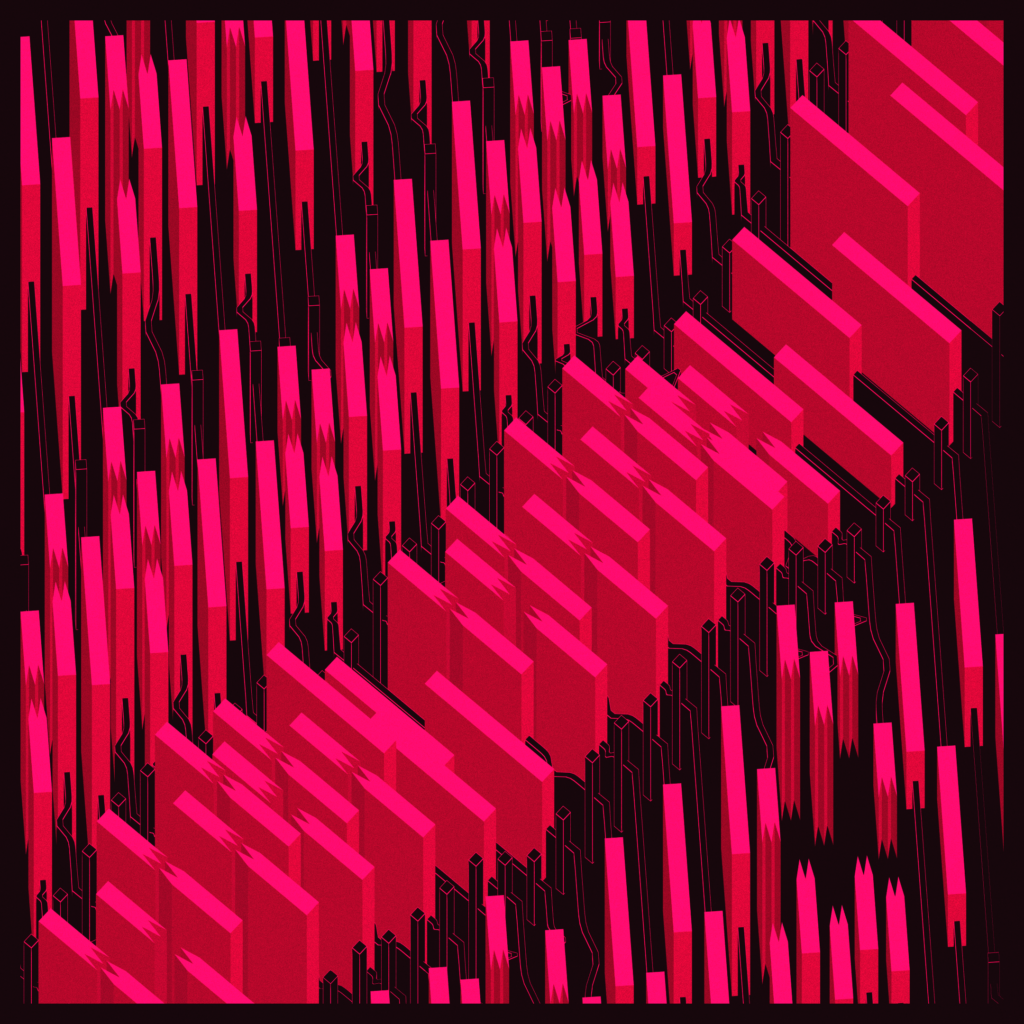
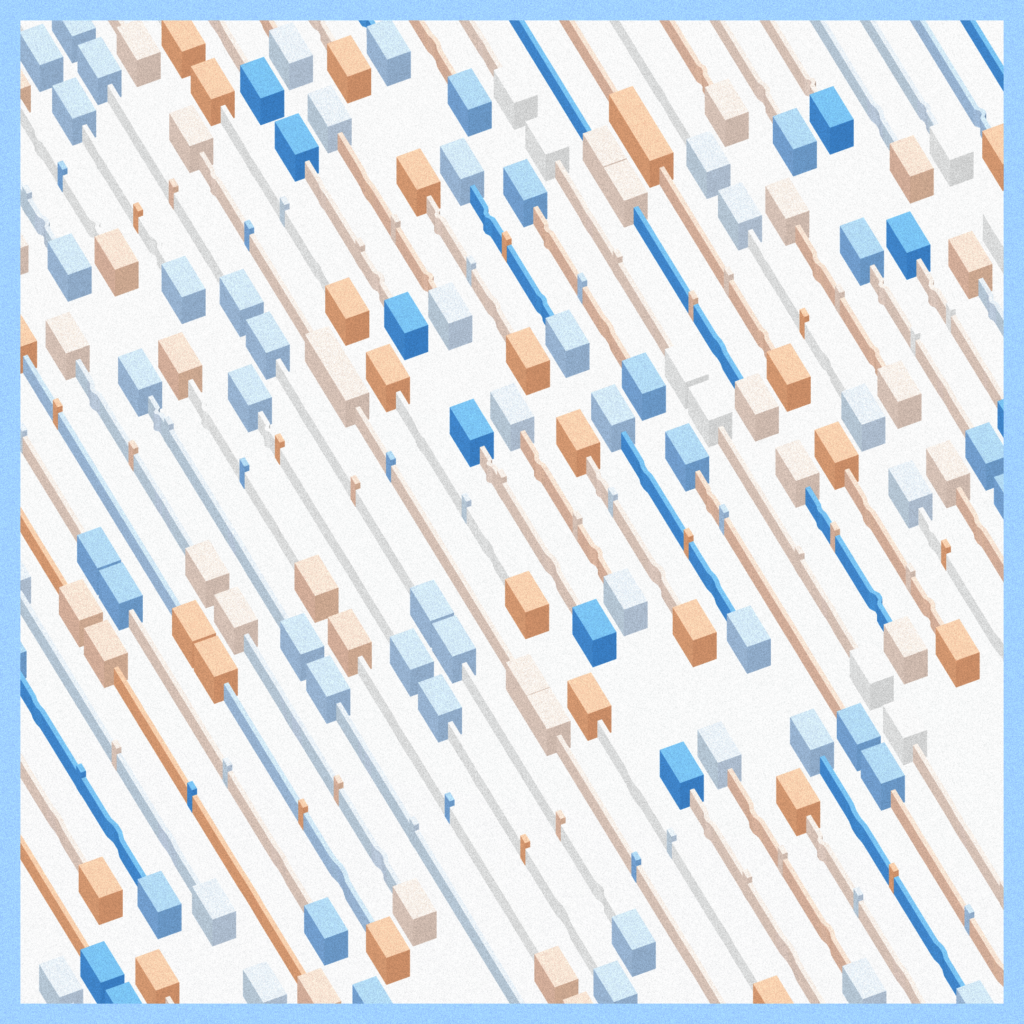
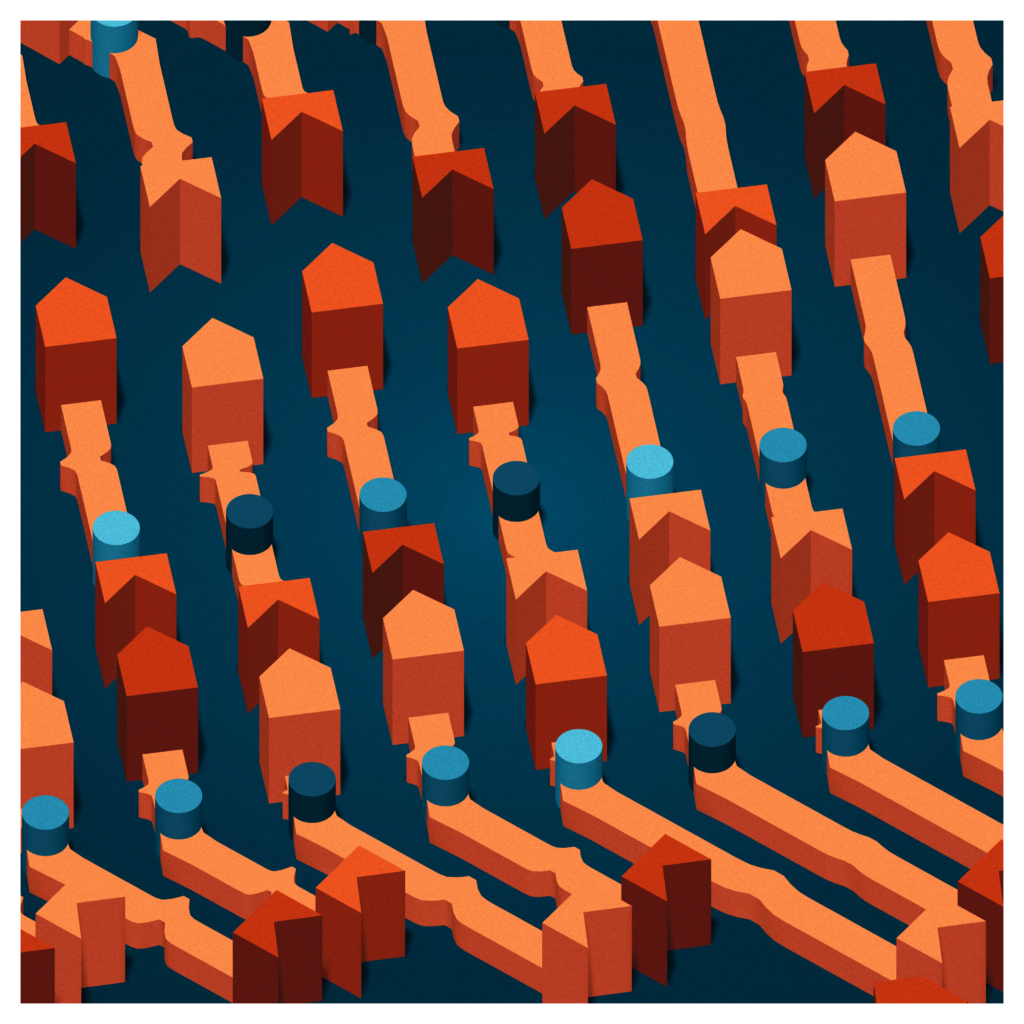
A line contains 4 of those units, and 40 lines are generated with various rules.
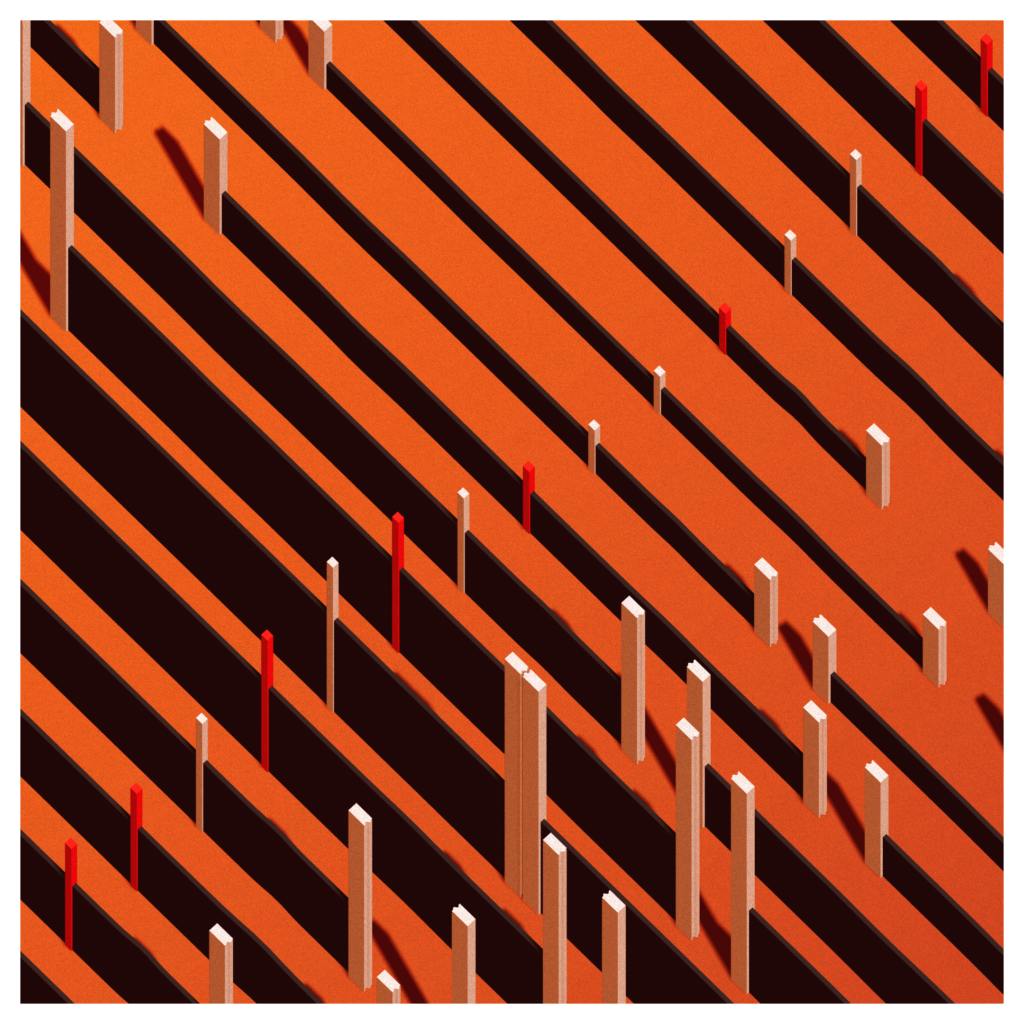
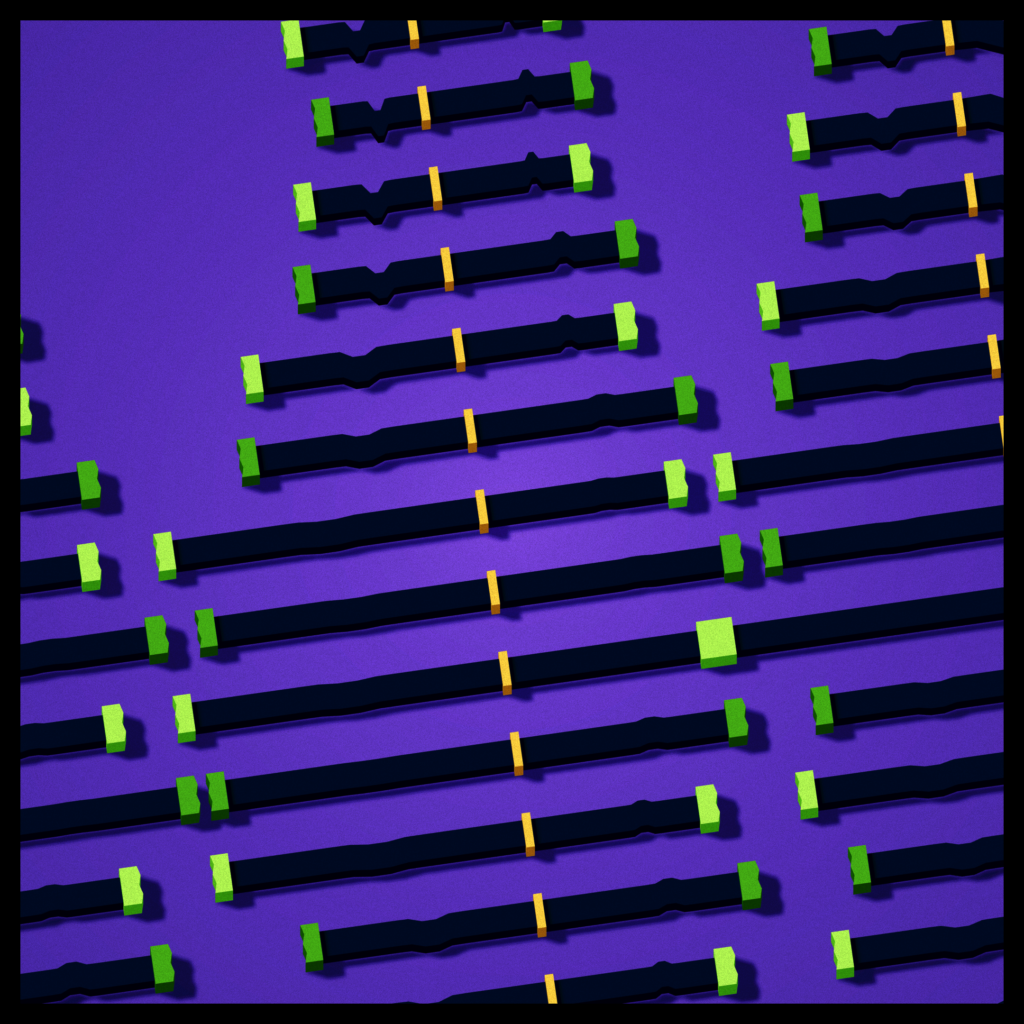
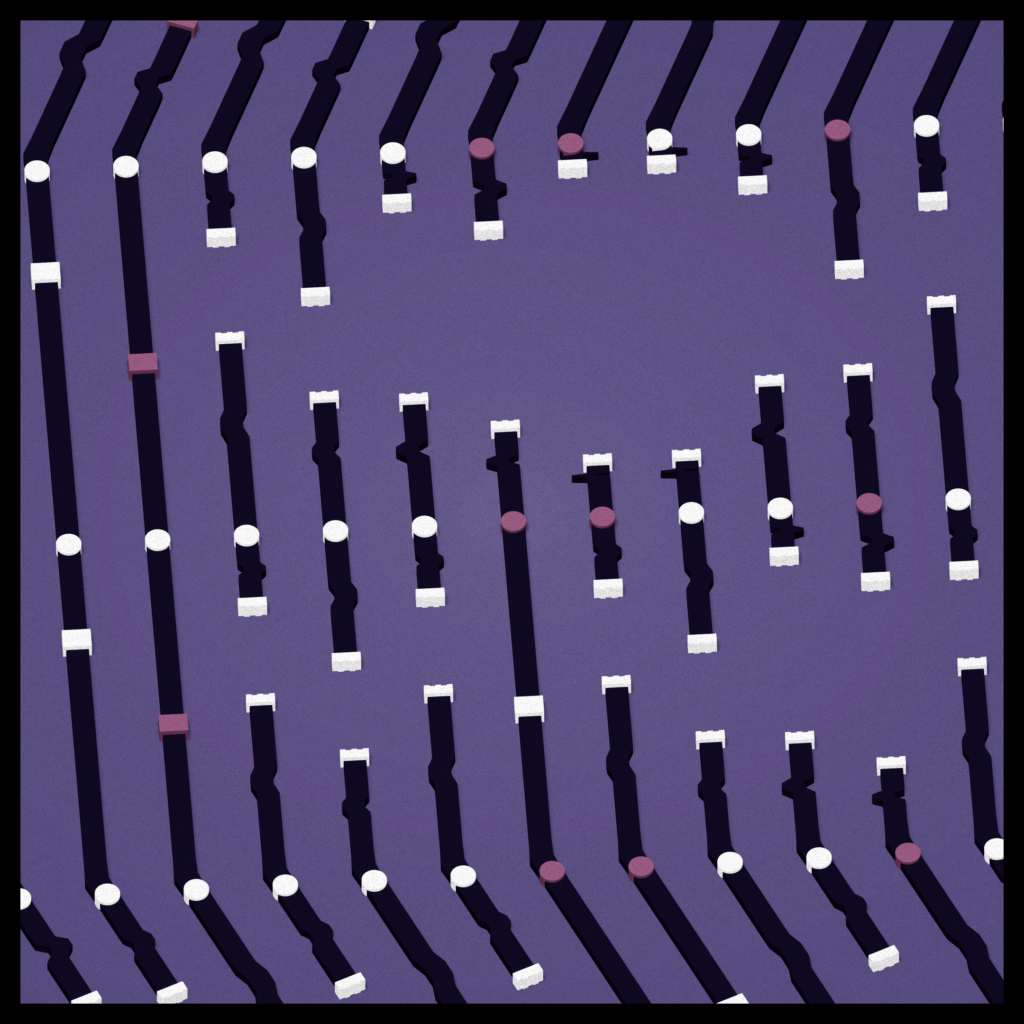
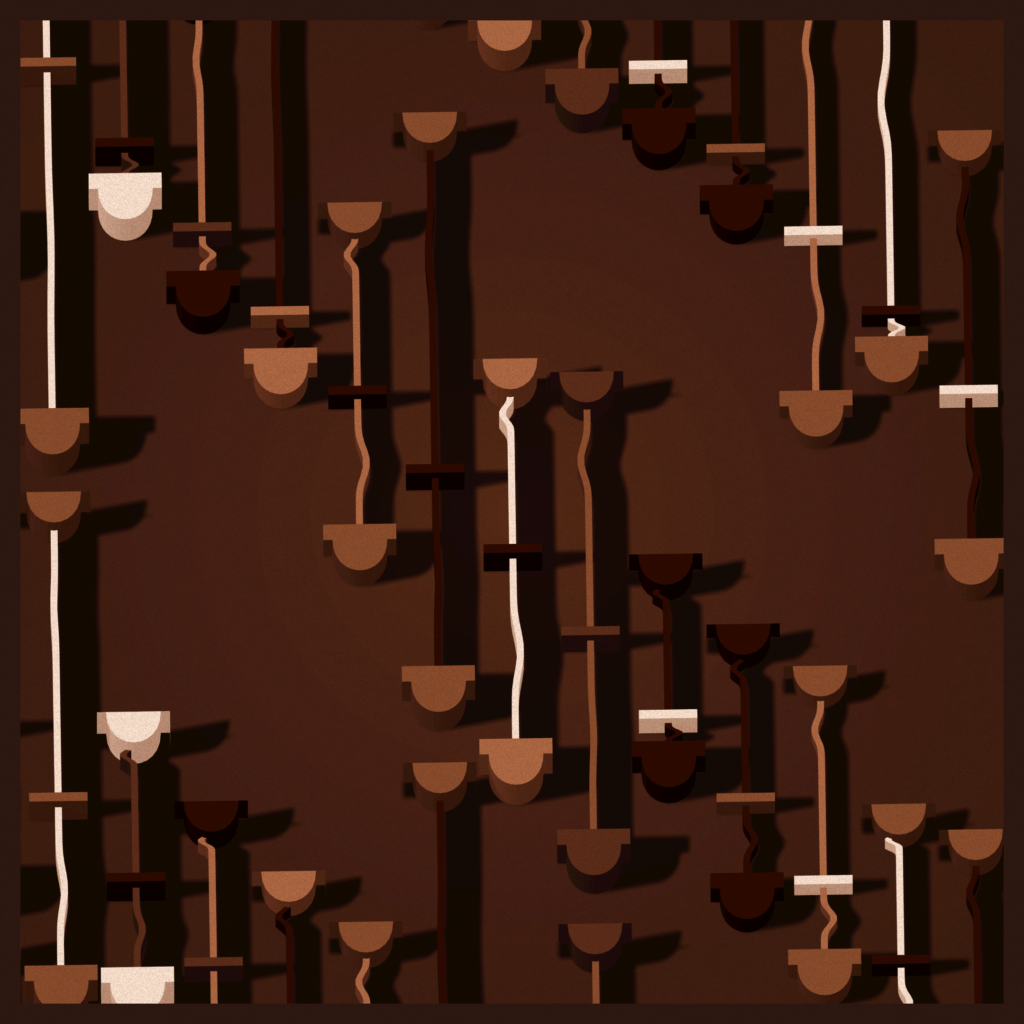
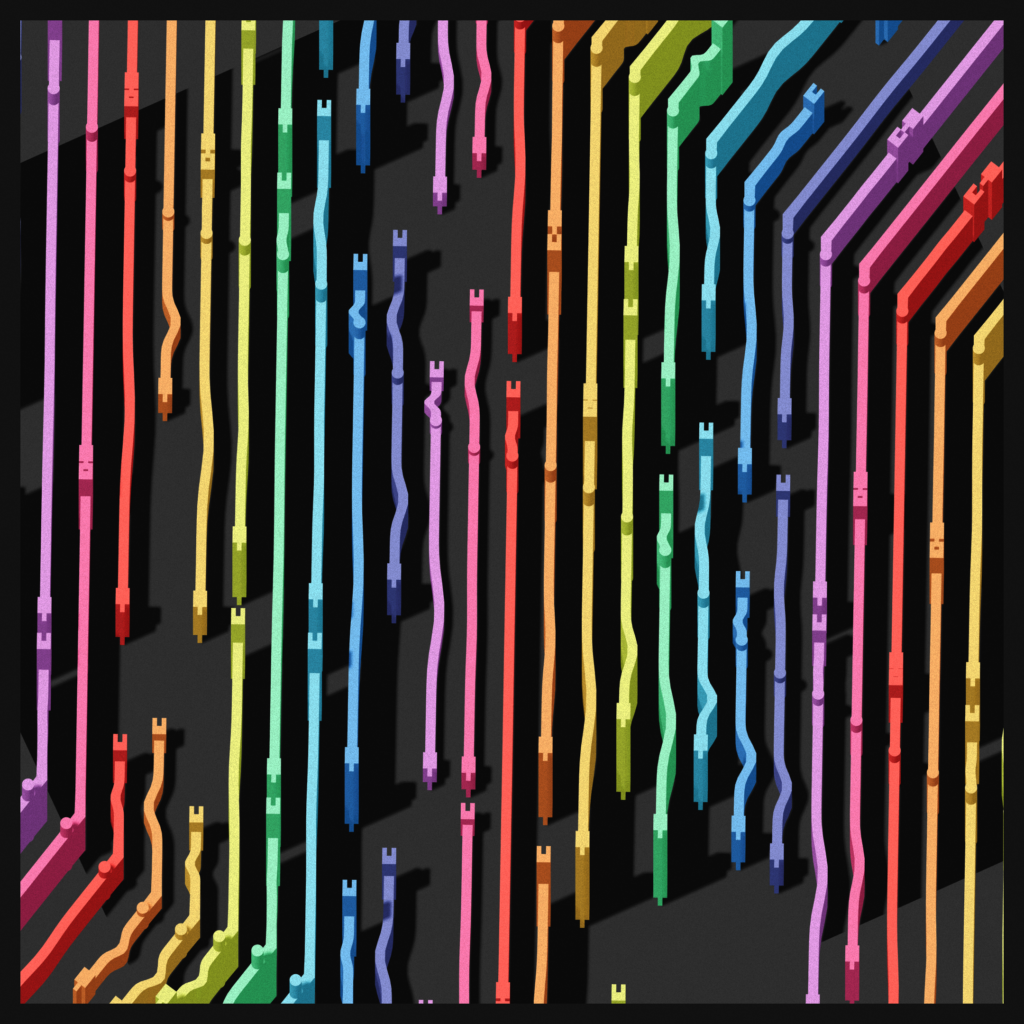
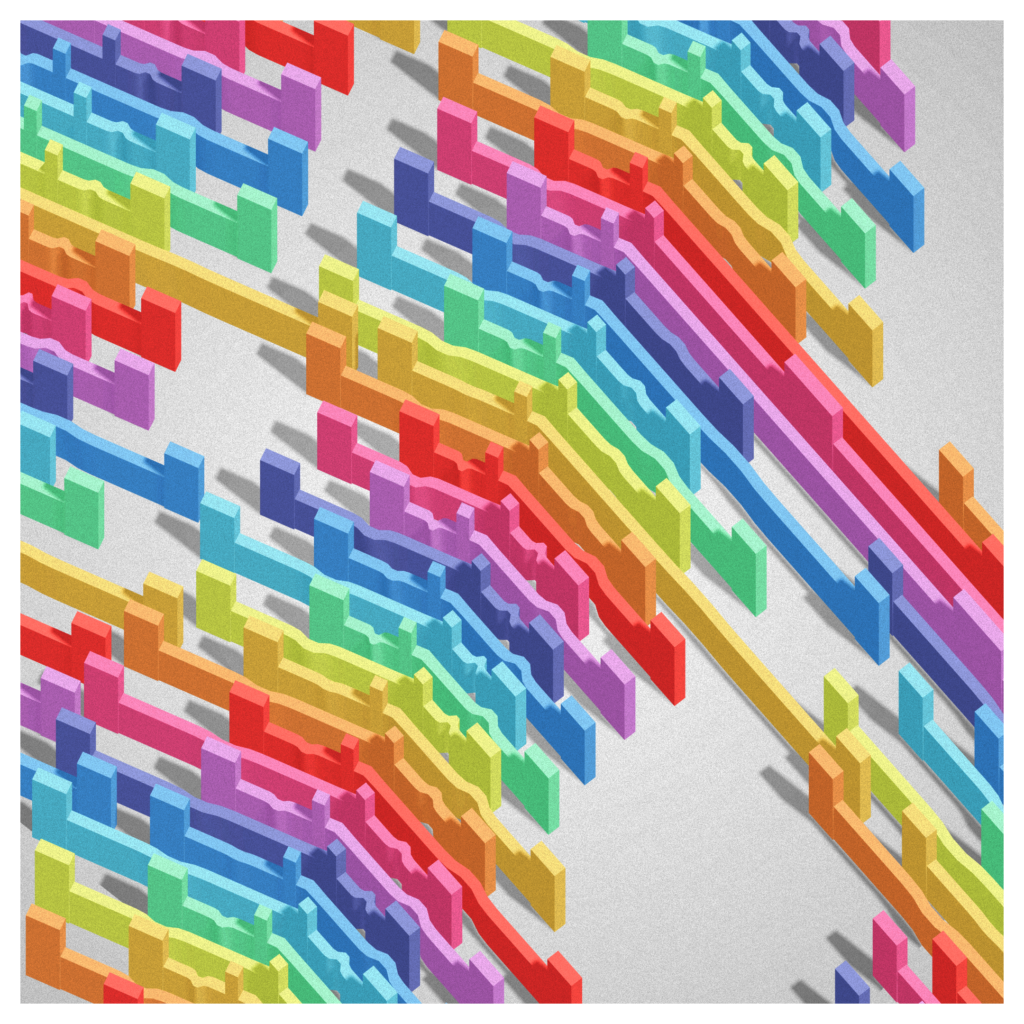
By playing with dimensions, lighting, colors and point of view, this very simple structure, repeated over and over, creates a multitude of patterns.
The opening value of each connector is sampled from a Perlin noise, adding curves in the negative spaces.
Once this robust unit in place, most of the rest of the work on this project was creating the various color palettes while implementing the necessary changes to the shading system (ie outlines, color distribution, etc.).
There’s mostly two types of method for the palette :
- Inspired : using colors from some reference and trying to make them work within my system
- Exploratory : just testing colors and going from there, while trying to offer variety to the whole set
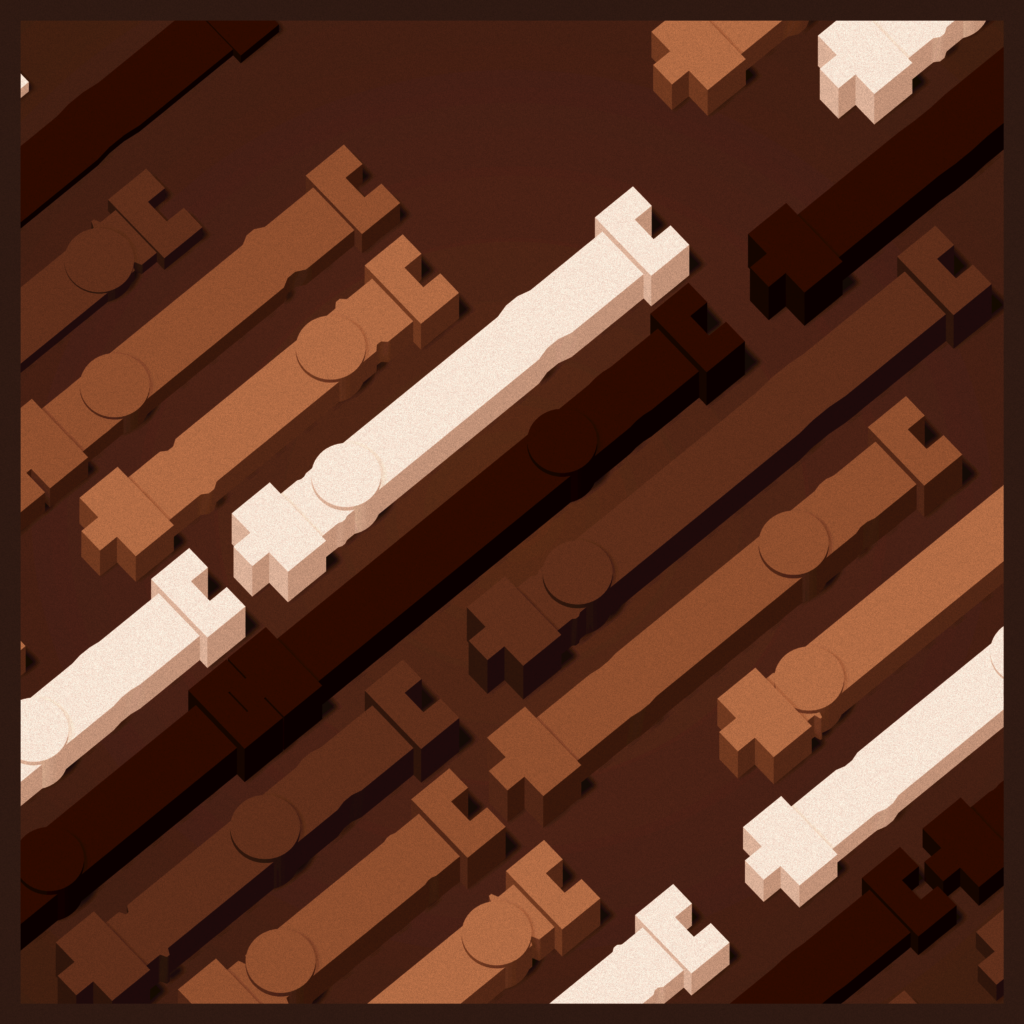
Special shout-out to old friend Danyboy, a very talented street artist and dinosaur lover, for the iq¹² palette, that I hadn’t used in a few years.
A friend of mine remarked that the project seemed way stronger in motion than static and I had to agree. The opening animation of the connectors was always a integral part of the design, but I added some interactivity on top : you can close the connectors, but they’ll reopen soon after on their own. It’s playful, and thematic. I also allowed some very limited control of the camera. No point in leaving full camera controls : there’s not much to see, no tricks to discover : what you see is really what it is : generated 3D shapes on a flat plane.
Execution details
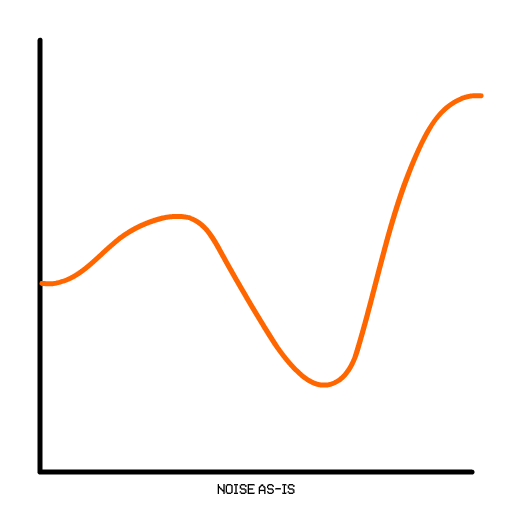
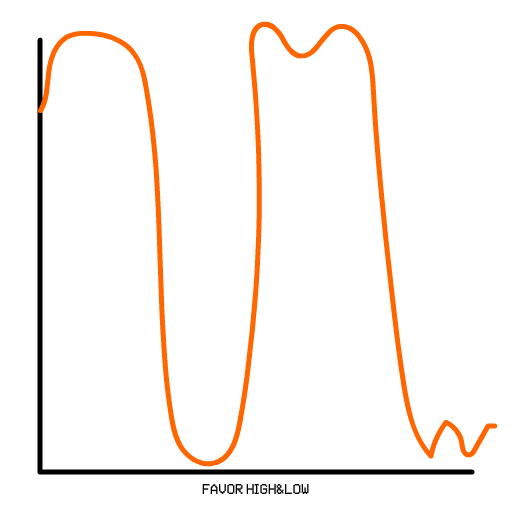
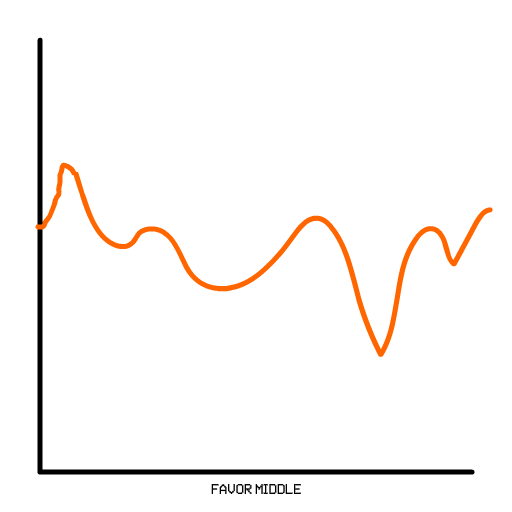
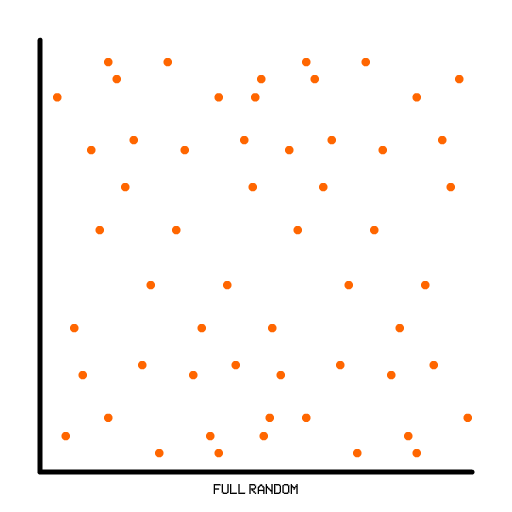
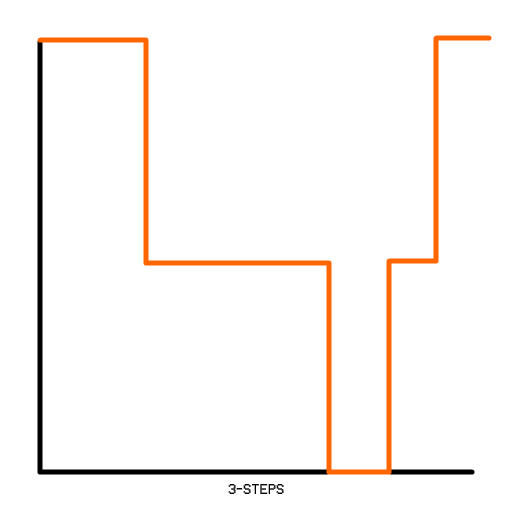
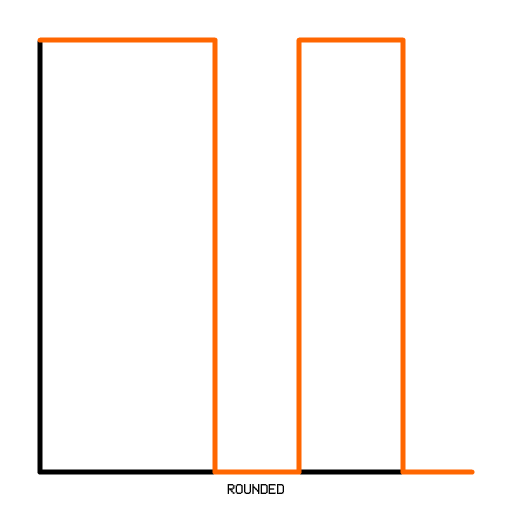
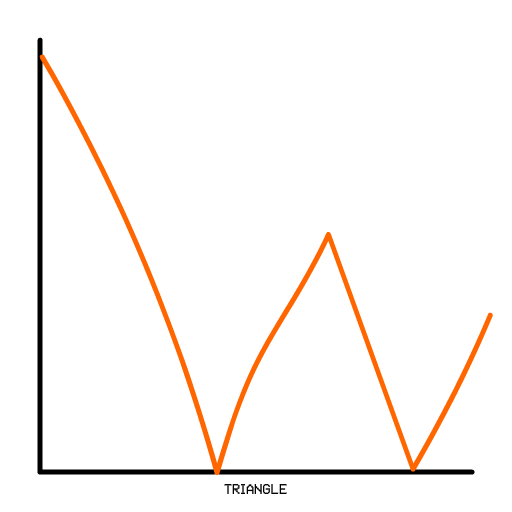
Opening strategy
The connectors opening values follow a reshaped 2D Perlin noise generated for each seed. Here are the modifiers :
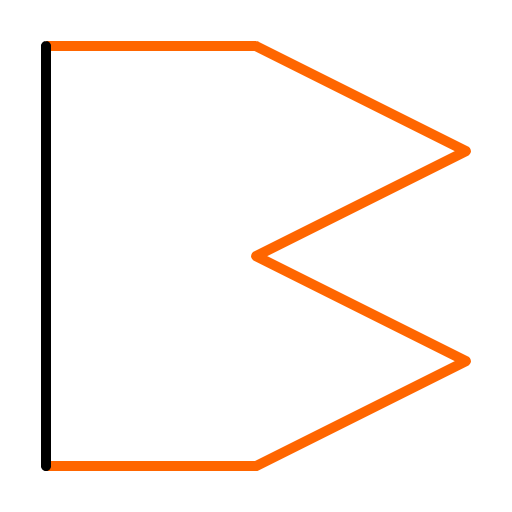
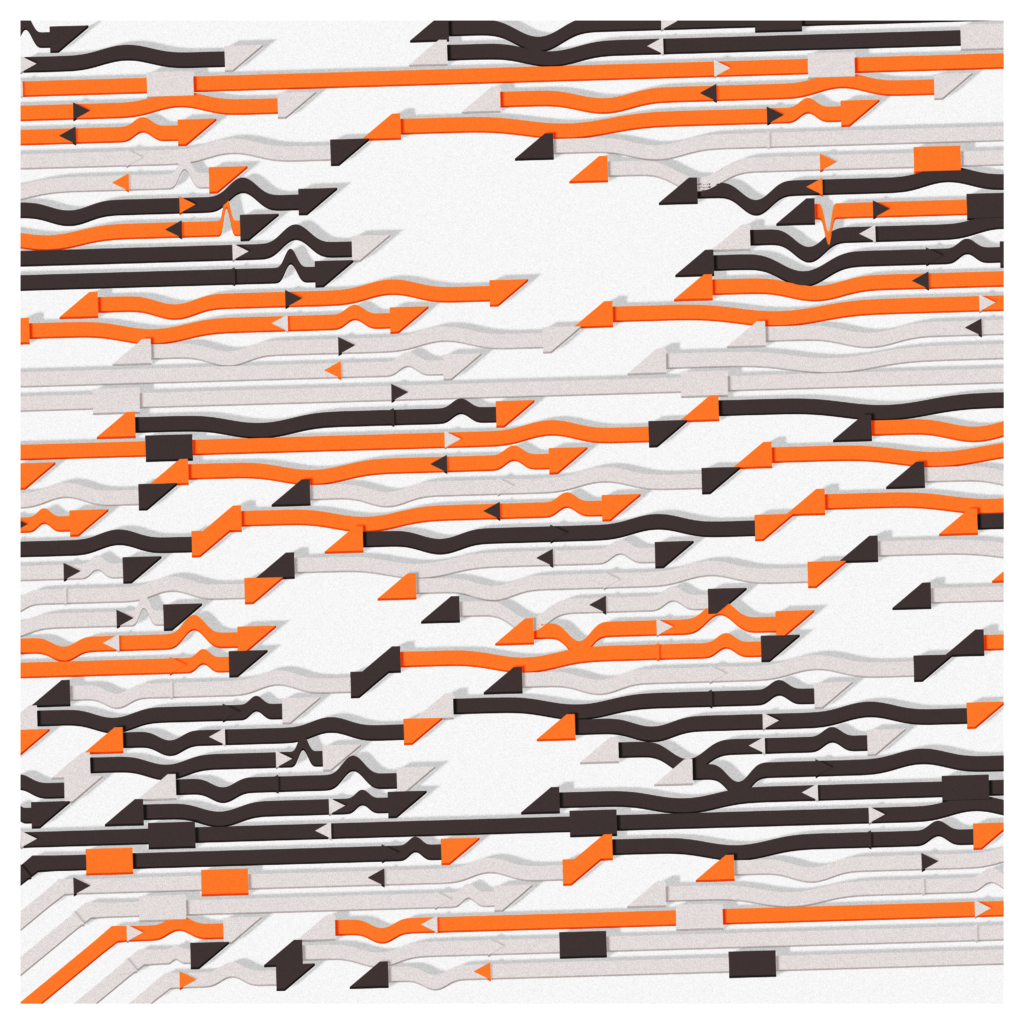
Connectors
Here are the various shapes for the connector. This shape is also used in the opening animation.


Palettes
The palette definition ended quite involved. Here’s the code for one to give you an idea of the options :
static p25:Palette = new Palette(
        "Saved by the bell", // name of the palette
        1, // weight of the palette in the random
        new Color(1,1,1),  // background color. Never seen in the end
        new Color().setHSL(0.55, 1.0, 0.5),  // ground color 1
        new Color().setHSL(0.5, 0.5, 0.1),  // ground color 2
        false,                   // is the ground gradient radial or linear
        [
            new Color().setHSL(0.09, 1.0, 0.55),  // colors for the connectors
            new Color().setHSL(0.95, 0.8, 0.55),
            new Color().setHSL(0.55, 0.7, 0.4),
            new Color().setHSL(0.4, 0.5, 0.4),
        ],
        [
            new Color().setHSL(0.09, 1.0, 0.55), // colors for the pegs
            new Color().setHSL(0.95, 0.8, 0.55),
            new Color().setHSL(0.55, 0.7, 0.4),
            new Color().setHSL(0.4, 0.5, 0.4),


        ],
        [
            new Color().setHSL(0.09, 1.0, 0.55), // colors for the lines
            new Color().setHSL(0.95, 0.8, 0.55),
            new Color().setHSL(0.55, 0.7, 0.4),
            new Color().setHSL(0.4, 0.5, 0.4),
        ],
        new Color().setHSL(0.00, 0.0, 0.5),  // ambient color
        new Color().setHSL(0.0, 0.0, 1.0), // light color
        new Color().setHSL(0.55, 0.7, 0.25), // frame color
        new Color().setHSL(0.0, 0.0, 0.0), // camera clear color
        false, // does the palette uses shadows
        false, // does the palette uses outlines
        [],  // colors of the outlines [connectors, pegs, lines]
        0.5, // chance of shadows
        [1,2], // colors distribution modes of the palette

    );
And here are the different options :


Leave a Reply